Tips to Get the Best Focus with your Camera While Taking Wildlife Photos

Tips to Get the Best Focus with your Camera While Taking Wildlife Photos

lace monitor

Wildlife photography can be quite challenging, as the subject rarely remains static. For example, an animal won’t always sit still and pose for your picture, so you need to be quick and focus well to get the right results. The focus, along with a decent shutter speed, determines how sharp your photograph will be. If the subject moves after the lens has focused, the image can be blurred. Below are some focus tips that will help you get the sharpest pictures possible.

#1 Combine Autofocus and Manual Focus

Even the slightest movement can change the focus; so when you’re on continuous or autofocus (AF) mode, the lens focus can shift just as you press the shutter button. You can avoid this with manual focus, which won’t shift after you’ve set it. However, it’s not always easy to adjust a lens manually, especially if you have a large lens and want to take photos of fast-moving wildlife. A great way to avoid all of these problems is to use both of them. You can use autofocus to find the best focus before you switch to manual and lock it.

#2 Change the Point of Focus

Most cameras allow you the freedom to change the focal point according to your preferences. You can blur the foreground and highlight the background based on what you want to focus on and the aperture you set. If you choose AF, the camera selects a spot to focus on automatically and in most cases, it gets the focus right. However, sometimes you might want to highlight something else so you can adjust. With wildlife, you can try to predict where the subject would be in the following few seconds and then focus on that spot with AF. For example, if you know a bird is going to fly in a particular direction, you can focus on that particular spot and wait until the bird gets in frame before you press the shutter button completely. This ensures the subject is in sharp focus.

#3 Understand Different Types of Autofocus

Modern cameras come with two different types of AF. The Single-Shot AF or SAF (called One Shot in Canon cameras) is used mainly for static, non-moving subjects such as landscapes, macro, buildings or non-moving wildlife or people. This means the focus won’t change after it’s confirmed. The Continuous autofocus or CAF (called AI Servo for Canon cameras) is fluid and will shift as you follow your moving subject. Use Continuous autofocus on conjunction with burst or ‘repetitive shot’ mode.

If you have a passion for African wildlife, nature or travel photography and would love to go on a specialised small-number, professional African photo safari, please get in touch with Michael Snedic at WildNature Photo Expeditions. You can call him on 0408 941 965 or fill in this Contact Form and he will get back to you ASAP.

The Composition Aspect in Wildlife and Nature Photography

The Composition Aspect in Wildlife and Nature Photography

elephant - Okavanga Delta - Africa

Composition is one of the most important aspects of photography and many wildlife and nature photographers struggle with it. When you look at a landscape or animal, you see its beauty in full form and colour.  However, it’s not easy to capture the beauty you see with the camera and this is where composition matters. You need to set up the picture carefully to ensure you get the right shot at the right time and that’s what makes the image interesting. Here are four tips to help with your composition in wildlife and nature photography.

#1 Consider the Lines

Lines might seem insignificant but they have a big impact on the feel and mood of the picture. Straight horizontal lines represent order and calm and can make the picture feel peaceful. A flat, plain horizon is a great example of this so if you use it as a reference point in your picture, the overall effect would be very calming. Vertical lines, on the other hand, represent majesty and power and can leave a person feeling a sense of awe. A great example of such a picture would be a photograph of eucalyptus trees from the ground. Consider the lines in your frame and use them to your own advantage the next time you are out photographing.

#2 Pull Back a Little

If you have a zoom lens, it’s tempting to zoom in and take a close-up, especially of animals you would never dare get close to. However, sometimes it’s a good idea to pull back and capture the animal in its environment. This can be done in many different ways to get many effects. You can showcase how large an elephant is or how small an insect is by including their environment in the picture. Pulling back allows you to put things into perspective and that adds depth to the picture.

#3 Catch the Eye

There are very few things that can be more compelling than direct eye contact with the animal. There’s always a raw, primitive intelligence in the gaze that can make for a stunning photograph. If you’re not sure about how you want to compose the shot and want to take a picture quickly, focus on the eye and click. If you’re lucky, you might get a picture of the animal looking back at you. You might also capture a shot of the animal gazing intently at its prey.

#4 Don’t Place the Subject in the Dead Centre

Most professional photographers will follow this rule and not place the subjects in the centre of the picture. Such pictures are often mundane and don’t show depth or contrast.  It’s safer to place the subject slightly off-centre, when framing your image.

If you have a passion for African wildlife, nature or travel photography and would love to go on a specialised small-number, professional African photo safari, please get in touch with Michael Snedic at WildNature Photo Expeditions. You can call him on 0408 941 965 or fill in this Contact Form and he will get back to you ASAP.
8 Tips to Capture the Beauty of a Landscape

8 Tips to Capture the Beauty of a Landscape

tips to capture the beauty of a landscape

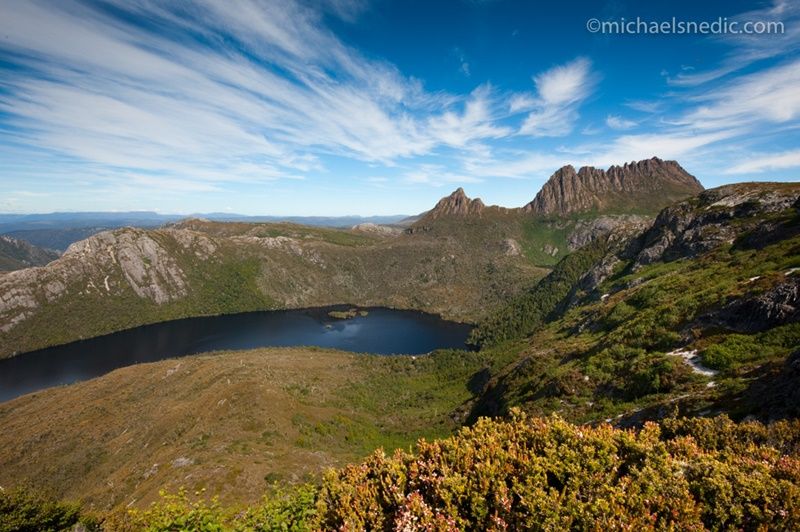
Nature has abundant beauty and some landscape scenes are just meant to be captured and preserved. While nothing can really live up to the real thing, you can come very close with a decent camera and some photography skills. If you want to capture the beauty of a landscape as effectively as possible, you should consider these tips:

#1 The ‘Magic Hour’

The ‘Magic Hour‘ or the ‘Golden Hour’ is the term used for a short period of time just after sunrise and just before sunset. At this point, the natural light is soft and often adds a golden glow to the picture. This is perhaps the most flattering lighting for photography and is commonly utilised by professionals to add a little bit of magic to their images.

#2 Composition – Rule Of Thirds

The rule of thirds is one of the first and most important lessons new photographers learn. You need to imagine breaking the landscape down to thirds vertically and horizontally. You’ll form a grid over the image which has 9 parts. This helps you determine the most important aspects of the picture as well as the most useful position for all elements in the picture.

#3 Make the Effort To Get Out There And Explore

Great shots won’t always magically come to you. You need to go out and seek them out and that requires exploration of the landscape. Most professional photographers observes the landscape, considers the direction of the lighting, look at foreground interest and plan their shot accordingly. They will also often come back repeatedly to the same location, until conditions are perfect.

#4 Using Graduated Neutral Density Filters To Reduce Bright Skies

Skies can be blindly bright and that can have an impact on the quality of the pictures. A graduated neutral density (ND) filter will reduce the brightness in the sky and add light to an otherwise dark foreground. A graduated ND is a very easy filter to use and delivers great results, especially in outdoor landscape photography. The same effect can be created post-production, using software programs such as Adobe Lightroom.

#5 Foreground Detail

You can make an image much more interesting if you have some foreground detail. While pictures of a beautiful sky can be stunning, foreground details like rocks, trees, etc., can add depth and character to the image. That can make for more interesting and compelling landscape scenery.

#6 Shoot Using RAW

Most professional photographers shoot pictures in the RAW format because that allows them to retain all of the image data collected. Formats like JPEG compress the image data, which can lead to loss of certain details and that can have an impact on the overall image quality. RAW ensures more detail is captured in-camera and that can be edited according to your preferences later.

#7 Slower Shutter Speeds For That ‘Milky Water’ Effect

Slow shutter speeds allow you to create that ‘Milky Water’ effect for waterfalls and cascades. A sturdy tripod is recommended, along with a remote or cable release, for guaranteed stability.

#8 Use A Sturdy Tripod To Minimize ‘Camera Shake’

A shaky tripod doesn’t deliver satisfactory results and compromises the image quality, often resulting in a blurry image. A sturdy tripod reduces the amount of shake and allows you to take sharp, focused landscape images.

If you have a passion for African wildlife, nature or travel photography and would love to go on a specialised small-number, professional African photo safari, please get in touch with Michael Snedic at WildNature Photo Expeditions. You can call him on 0408 941 965 or fill in this Contact Form and he will get back to you ASAP.
7 Starter Tips to Photographing Wildlife

7 Starter Tips to Photographing Wildlife

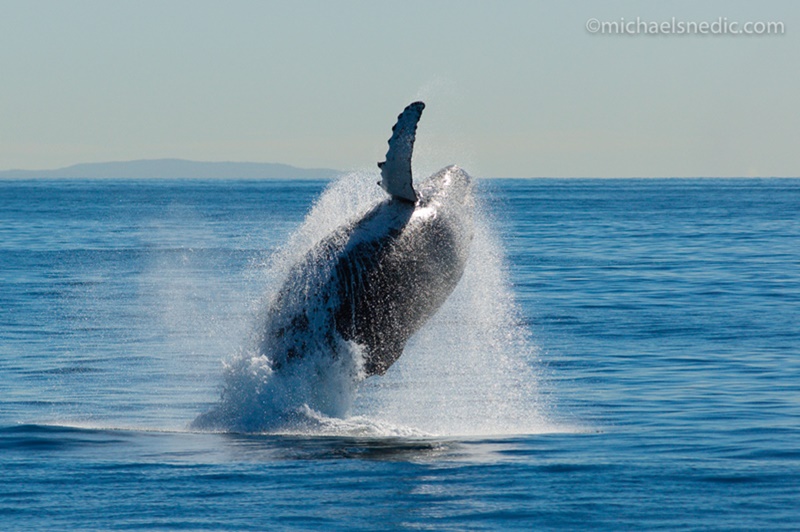
breaching humpacked whale

People on television and magazines make wildlife photography look easy and often produce stunning pictures of birds, animals, and insects. Unfortunately, such great results require considerable amount of skill and experience. No matter how sophisticated your camera is, you won’t get a great picture if you don’t know how to use it and take a picture. Here are some great tips for beginners who want to take stunning pictures of wildlife on their expeditions.

#1 Understand Your Equipment

You’ll only be able to take great pictures if you’re very familiar with your camera and equipment so if you have a new device, you should take your time to learn how to use it. Wildlife photography almost always requires a quick response and you need to be comfortable with your camera to do so.

#2 Lighting is Important

Lighting is everything. Most wildlife photography is done in natural light and you can’t rely on flash; so you need to make sure your subject is well lit before you take the shot. Great lighting will enhance the beauty of the animal and ensure all the colours and textures stand out; so be patient and wait for the best possible lighting for your shot.

#3 Quick Response is the Key

As we mentioned before, you need to react quickly to get a great shot of the animal, especially if you want to catch them doing something interesting. For example, a cute little leopard cub yawning would be a perfect shot but you need to react quickly to capture it. You should practice quick responses before you go on your expedition to ensure you’re ready.

#4 Eyes are the Mirror of the Soul

If you want to take an impactful picture, focus on the eyes. Almost everyone is naturally drawn to the eyes of human and animal subject; so if you focus your camera on the eyes, you’ll have a picture that would speak to viewers and make the subject more interesting. There are few things more powerful than staring into the eyes of large predators like tigers and lions.

#5 Keep the Subject in Focus

Animals are mesmerising, even when they’re sitting idle so it’s difficult to take your eyes off of them and focus on your camera. However, that’s exactly what you need to do when you take pictures. Animals won’t sit still for you to take a picture so you need to make sure that despite their motions, they’re completely in focus.

#6 Include the Environment

Wildlife pictures are compelling because you can see animals in their natural habitat when you look at them. While the animals are the most important aspect of the picture, the background adds dimension and depth to the picture and tells a story. You don’t need to focus on the background, but be sure to include it. Sometimes, the background just enhances the overall effect. For example, if you focus on just an elephant, you won’t be able to appreciate the sheer size and scale of it, but if you pull back a little and include some of the background, the majesty of the animal is revealed.

#7 Be Patient and Quiet

You also require patience and quiet movements when you intend to take wildlife pictures. Animals can react unpredictably if you startle them and they won’t follow your instructions and pose. To the best shot, you need to work with the animal’s natural behaviour.

If you have a passion for African wildlife, nature or travel photography and would love to go on a specialised small-number, professional African photo safari, please get in touch with Michael Snedic at WildNature Photo Expeditions. You can call him on 0408 941 965 or fill in this Contact Form and he will get back to you ASAP.
Tips for Photographing Reptiles

Tips for Photographing Reptiles

barking gecko

Photographing reptiles may seem quite easy to some, as they often don’t move around much (especially in the colder months). There are, however, a number of pitfalls that you can fall into if you are not careful. With many reptiles living predominantly on the ground, it may seem easier to photograph them from above, but you really need to get down low. Photos of reptiles/wildlife look so much better if taken from eye level. Also, try and photograph the amazing patterns in their eyes or skin, by getting as close as possible (except the venomous ones!).

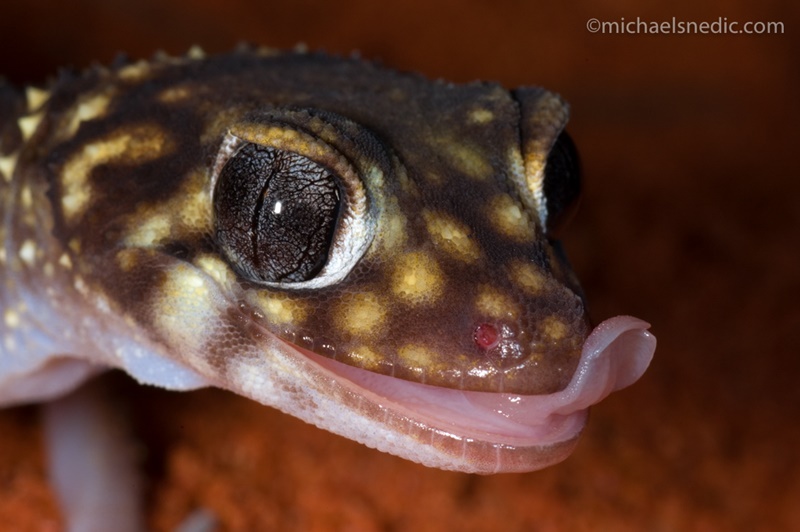
Getting the photo of this Barking Gecko was quite a challenge, as it was fairly active. I used a macro lens on my SLR camera with a macro flash attached, making it portable. I then lay on my stomach and followed the little gecko’s every move. Apart from waiting for it to stop moving, I was also hoping for some sort of “behaviour” to occur, so patience was required. Due to the gecko’s shiny skin, I didn’t want to overexpose the photo and therefore added a diffuser over the flash, in order to soften the light on the gecko’s body.

Lying on your stomach, with elbows propped on the ground, isn’t the most comfortable of positions when you are trying to photograph a constantly moving reptile, but sometimes you have to get out of your comfort zone. To get “the” shot, you need to be prepared when behaviour happens. In this instance, the Barking Gecko eventually poked out its tongue and I was ready. I focused on its eyes with my macro lens and pressed the camera’s shutter immediately.

By using the correct photographic equipment, a bit of improvisation and lots of patience, you too can take great shots of reptiles. It’s certainly fun trying and the end results are often very pleasing indeed.

If you have a passion for African wildlife, nature or travel photography and would love to go on a specialised small-number, professional African photo safari, please get in touch with Michael Snedic at WildNature Photo Expeditions. You can call him on 0408 941 965 or fill in this Contact Form and he will get back to you ASAP.
Painting with light

Painting with light

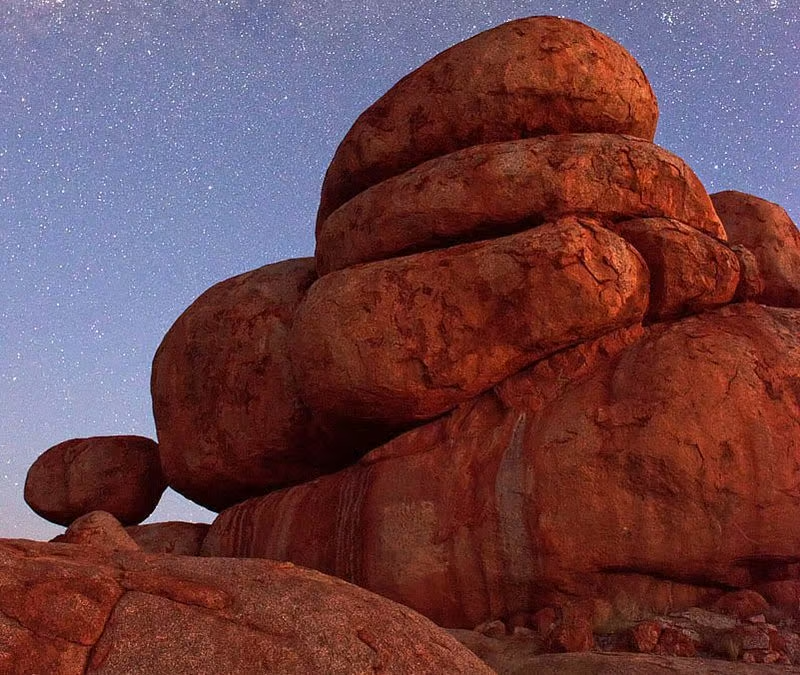
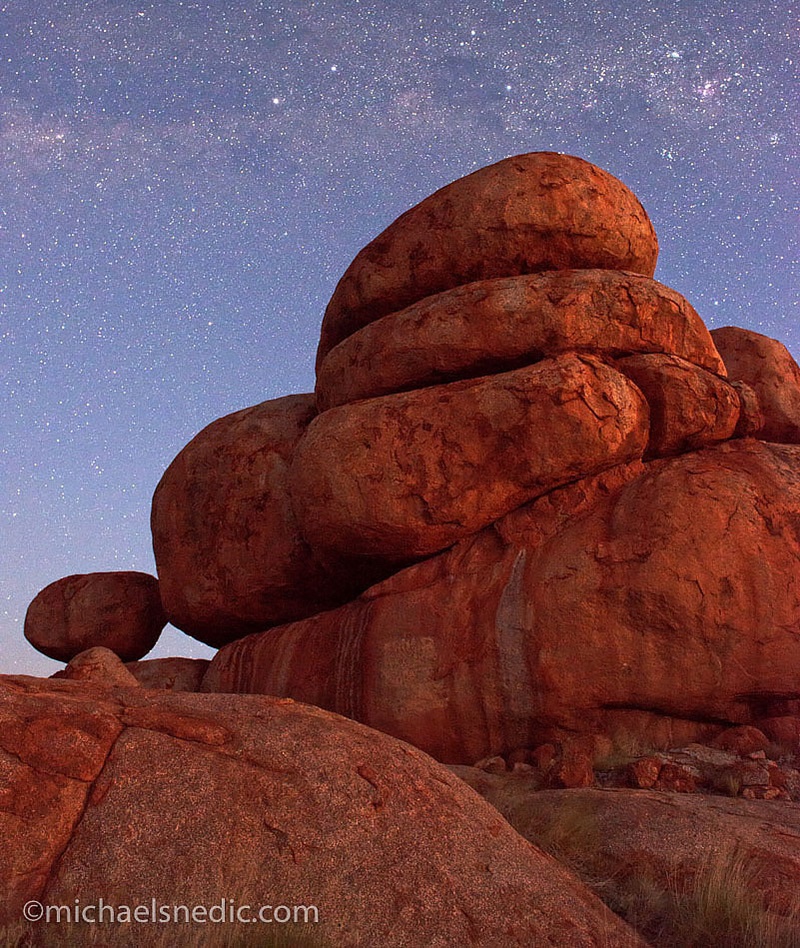
Devils Marbles

A great way to create extra ‘mood’ when taking photos of landscapes at night is to ‘paint with light’. You do this by using a strong torch and throwing extra light onto the main subject of your image, such as rocks or trees.

Firstly, you need to use a sturdy tripod and a cable release or remote, to stop any ‘camera shake’. Compose your image so that the sky is visible, with your main subject the main feature. If you want to capture the stars but don’t want to have streaks appear in your image due to them moving, your shutter needs to be around 30 seconds or a tad slower. During that time, use a strong torch and evenly ‘paint’ the subject, so that no one area of your image has too much light, while the other is under lit. Also use a low ISO, to reduce any ‘noise’ in the image.

Using a headlamp makes it possible to see the settings on your camera, while freeing up your hands. I strongly recommend using one!!

For the image featured here, taken of the Devil’s Marbles in the Northern Territory, Australia, I used a very strong torch and moved it around the rocks from left to right, up and down and also in a circular motion. This minimised particular areas of the rock being too overblown with light. I needed a few attempts to get the exact effect I wanted, but in the end it worked a treat!

If you have a passion for African wildlife, nature or travel photography and would love to go on a specialised small-number, professional African photo safari, please get in touch with Michael Snedic at WildNature Photo Expeditions. You can call him on 0408 941 965 or fill in this Contact Form and he will get back to you ASAP.

Would you like a FREE copy of my new Ebook?

Download Button

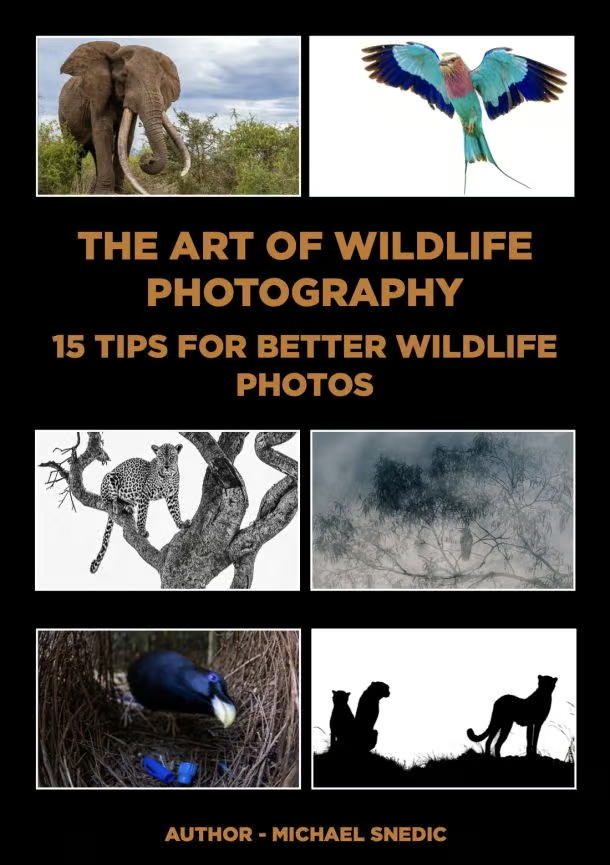
ebook The Art of Wildlife Photography by Michael Snedic July 2026 cover

You have Successfully Subscribed!