7 Day Lord Howe Island Photography Tour

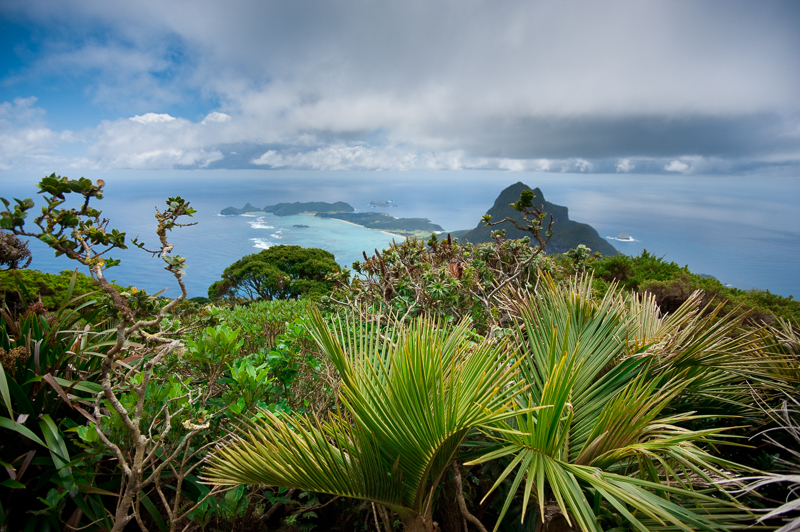
View to Mt Lidgebird - Lord Howe Island

Saturday 28th of November to Friday 4th of December 2026


Location:

World Heritage Listed Lord Howe Island

$AU5490 (plus GST) per person twin share. Single supplement $AU1650 (plus GST)

Please note: WildNature Photo Expeditions will endeavour to find someone to share with you, from the photography group. If no one is available to share, then a single supplement will be added and you will have your own room.


Lord Howe Island

Contact Michael Snedic directly
on +61 408 941 965

Dates:

Saturday 28th of November to Friday the 4th of December 2026

Participants:

Maximum of 8 participants
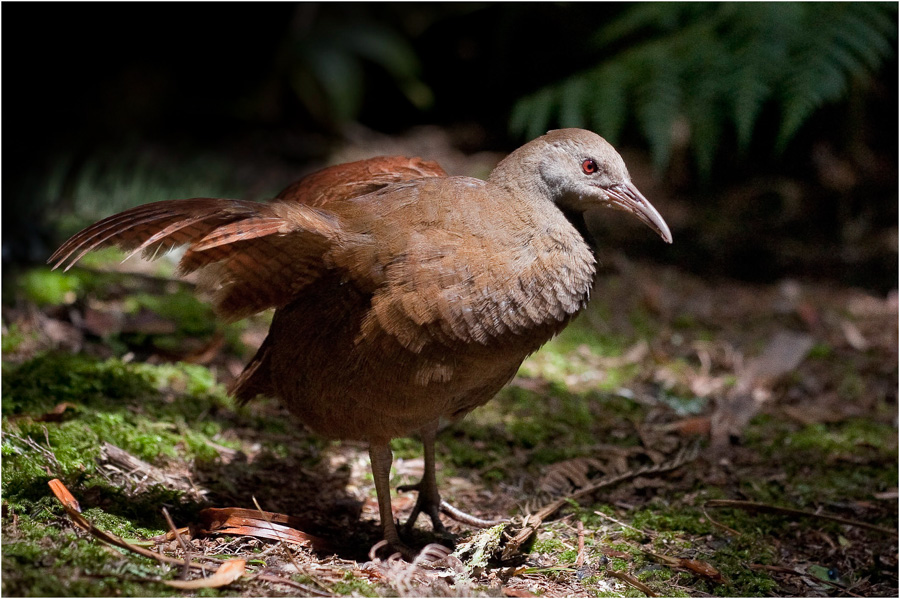
Lord Howe Island Woodhen

Bookings:

For more information, or make a booking for this fantastic Lord Howe Island photography workshop, please contact Michael via his Contact Form or call him on +61 408 941 965

About Lord Howe Island

Rising majestically out of the Tasman Sea 550km off Australia, World Heritage Listed Lord Howe Island is a photographer's paradise.

Fed by a mix of warm and cool currents from The Great Barrier Reef, New Caledonia, New Zealand, and Australia, this crossroads in the South Pacific is a treasure trove of fauna and flora housed on a 7 million-year-old extinct volcano.

At the southern end of the island, the often cloud-covered twin peaks of Mt Gower and Mt Lidgebird rise perpendicular form the sea. To the north, the sheltered coral lagoon (one of the most southerly coral reefs in the world) arcs around the tiny settlement of Lord Howe. Ancient rainforests cover the slopes, and kilometre after kilometre of white sandy beaches and rocky shores await exploration by you and your camera.

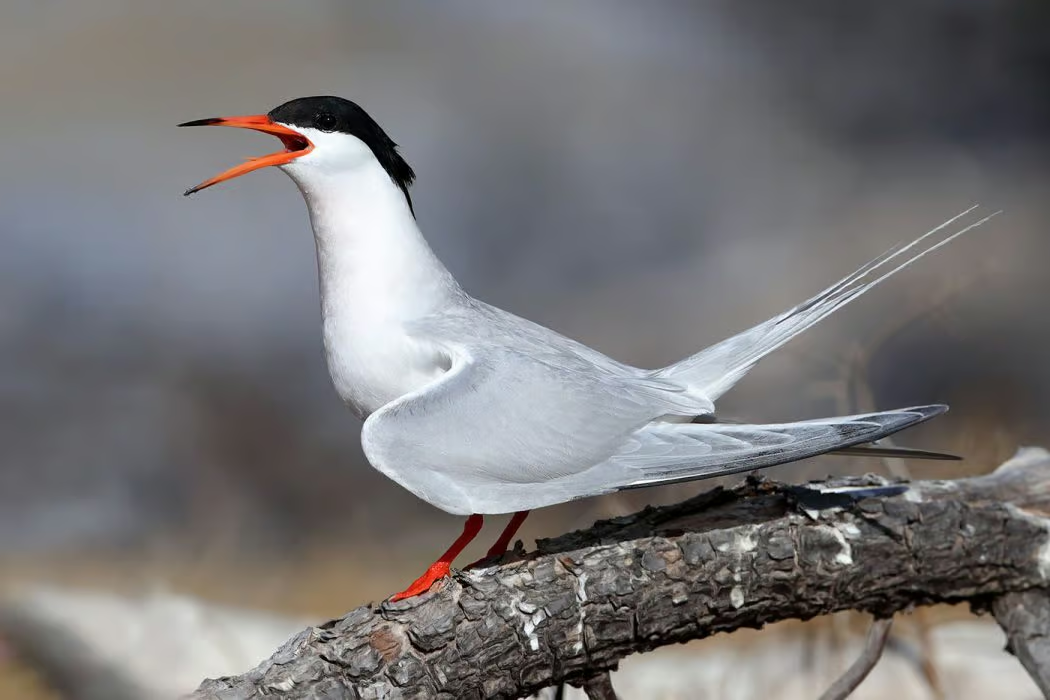
Spring has been chosen not only for its favourable weather and warming seas, but particularly for the incredible bird-life, which descends on the island for the breeding season. Many exotic sea-bird species nest on the rocky shores, including terns, shearwaters, gannets and tropic-birds, along with the famous Lord Howe Island Woodhen in the forested areas.

View from Malabar Hill - Lord Howe Island

About the Lord Howe Island Tour

This workshop will be presented by professional wildlife and nature photographer and tutor, Michael Snedic. Upon arrival at Lord Howe you’ll be transferred to our workshop base, the centrally-located Ocean View Lodge, only a short stroll from the beach. The workshop will include a blend of structured lectures including informal discussions and one-on-one tuition time, as well as a boat cruise with snorkelling. These sessions will be interspersed with free time to make up your week of photographic learning.
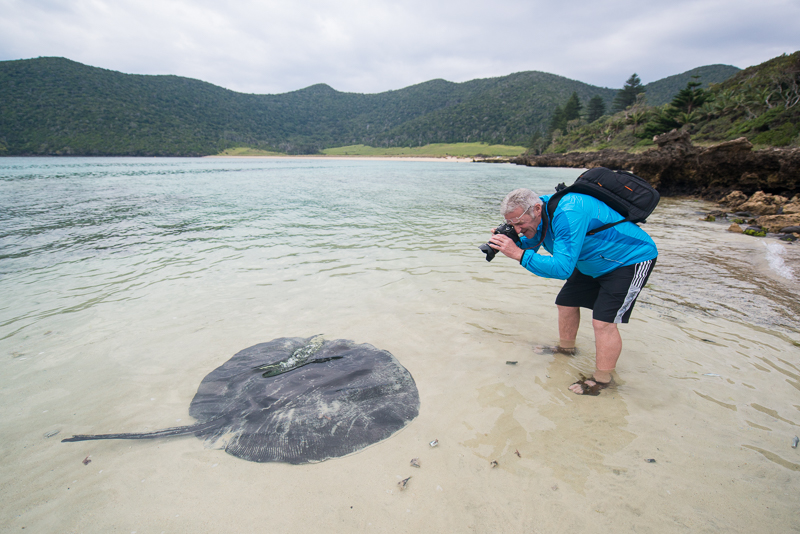
Photographing Rays on Lord Howe Island

Photographic Prerequisites

This workshop is suited to the beginner, intermediate or serious enthusiast. A digital SLR (Single Lens Reflex) camera is recommended, however, any camera that has manual functions would also be suitable. A wide-angle and telephoto lens (and a macro lens if you own one) is recommended. A sturdy tripod is also necessary, especially for our landscape photography sessions.

Flights

You can book return flights via Qantas link from Sydney (I can recommend a travel agent who can help you with your flight booking, if required).

White Tern

Equipment

One of the wonderful things about visiting the island at this time is the abundance of birdlife and their relative fearlessness. Unlike some other locations you won't need 800mm lenses to make full-frame portraits of the birds. Telephoto lenses up to 200 or 300mm can be fine, although there'll always be times you want more. For landscapes, a decent wide-angled lens is recommended. A tripod is also essential for our sunrise/sunset shoots and they can be packed into your main suitcase.

When capturing photos of action such as birds in flight, the optical viewfinders and fast autofocus of DSLRs really shine. We will be helping you take advantage of all these features. Some of the "CSC"/mirrorless cameras can do good work here too. Compact cameras make reasonable backup cameras, but their reduced image quality and sluggishness would make them frustrating as primary camera bodies.
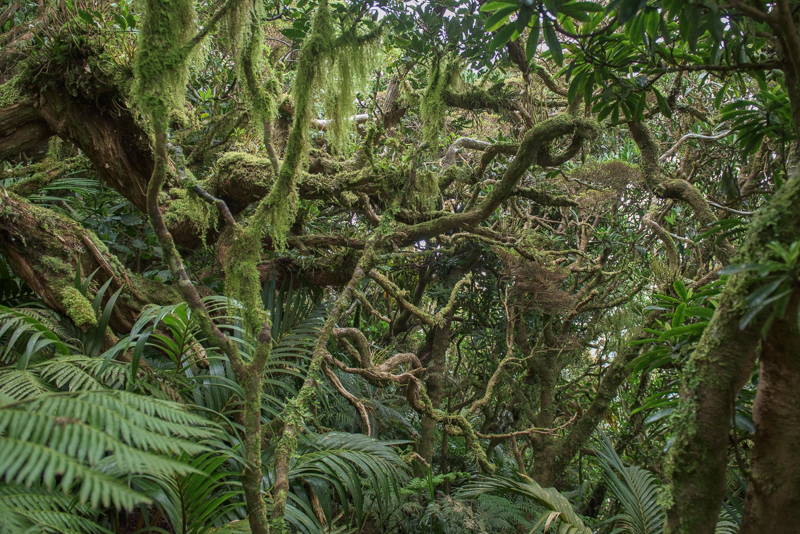
Rainforest Lord Howe Island

If your luggage allowance allows, we encouraged you to take a laptop computer to help you review and safely store your photos. Reviewing your images is an important step in improving your techniques for the next photo session and making the most of your limited time on the island.

Many of the locations we will visit on the island are a short walk from our accommodation, for some we'll travel by bus but some can require uphill climbing on uneven paths. It's not highly-technical climbing though, and we will have rests along the way. As far as your gear goes this does mean that not only do you need to be able to get your gear to the island, you'll need to be able to carry it along bush tracks. There's not much scope for roller camera bags in the field!

Internet access

There is web access available via WiFi at our accommodation and at various locations around the island.

Photographing Sooty Terns_Lord Howe Island

Some of the topics that will be covered:

  • Birds (including birds-in-flight0
  • Sunrises
  • Sunsets
  • Landscapes/seascapes
  • Composition
  • Aperture/Depth-of-Field
  • Lighting
  • Exposure and metering
  • Focusing points and styles
  • Filters
  • Image critique
  • And much more!

Valley of the Shadows Lord Howe Island

Highlights include:

  • Sunrise shoots at Ned’s and Blinky’s Beaches
  • Seascape and bird photography shoot at Malabar Sea Cliffs
  • Sunset shoot at Signal Point
  • Cruise and snorkelling at North Bay
  • Mt Eliza and North Bay bird photography shoot
  • Mt Gower and Mt Lidgebird photography from sea level
  • Bird photography including LHI Woodhens, Sooty Terns, White Terns and many more
  • Image critique

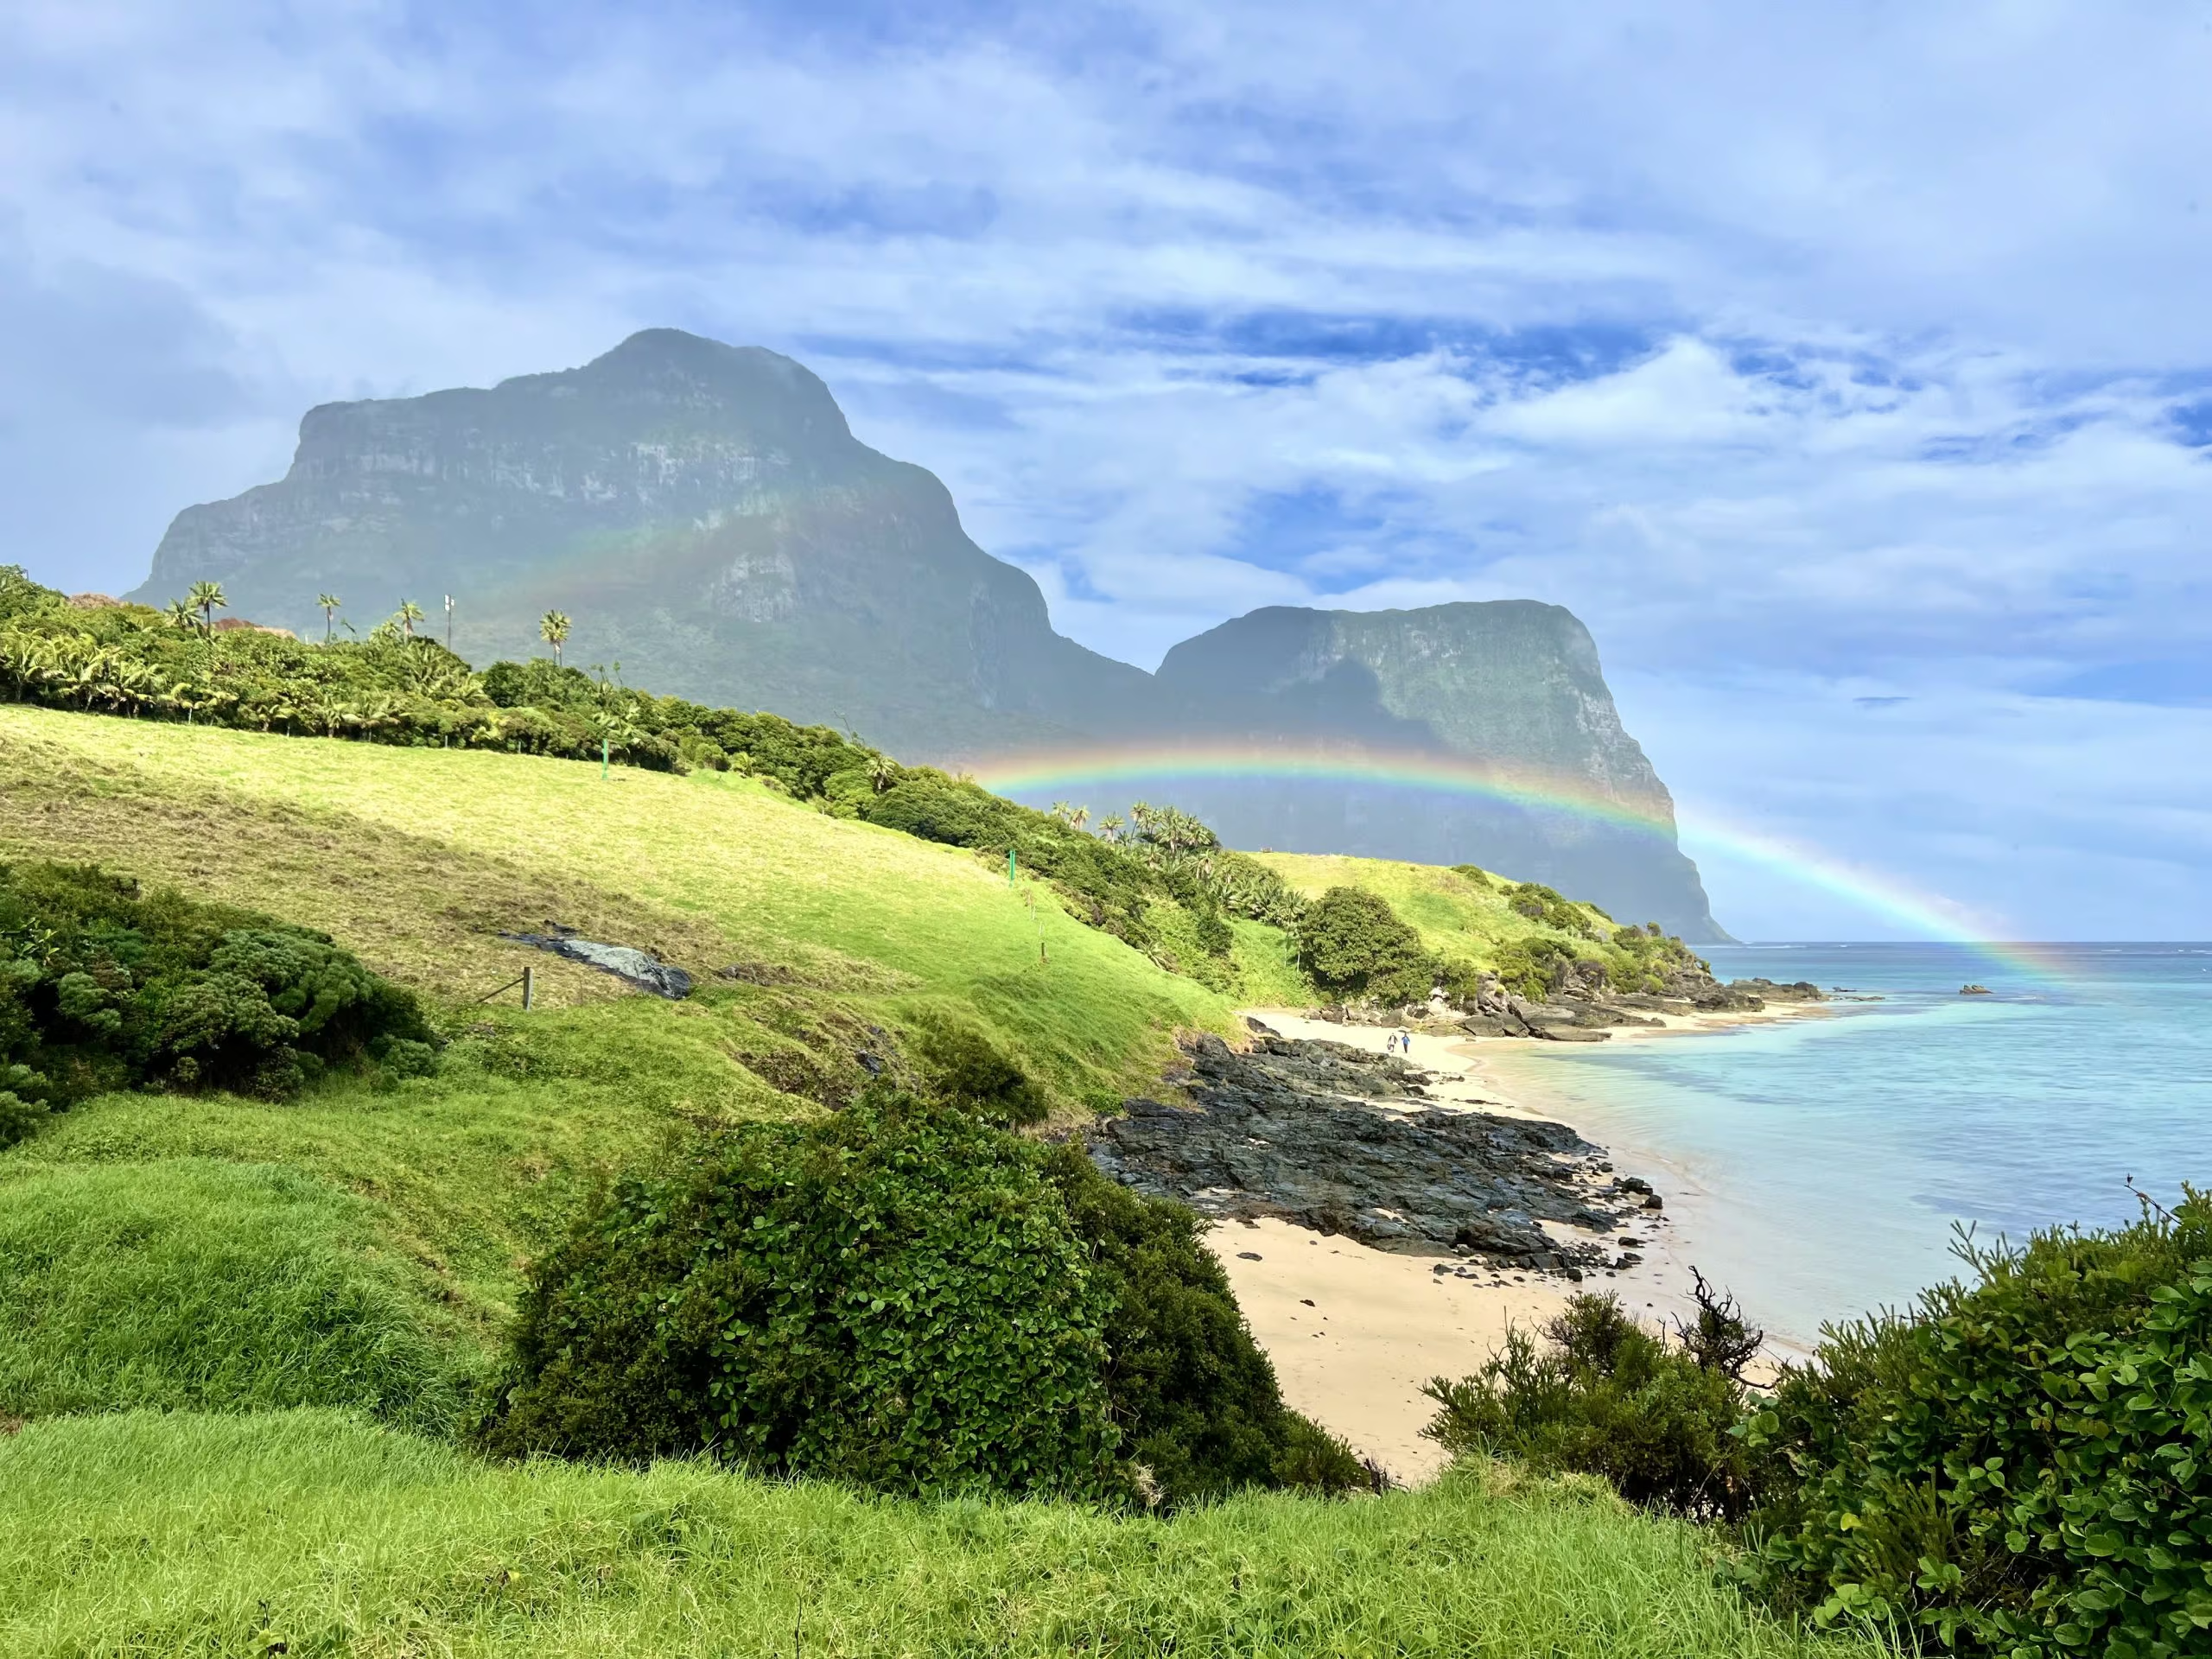
Rainbow over Mt Gower

Inclusions:


  • Photography tuition by Michael Snedic, as per itinerary
  • Accommodation (twin share) at Ocean View Apartments
  • Transport to photographic locations around the island
  • Boat cruise, which includes snorkelling

Exclusions:


  • Flights to and from Lord Howe Island
  • All meals
  • Any extra personal expenses (extra hot drinks, alcohol etc)
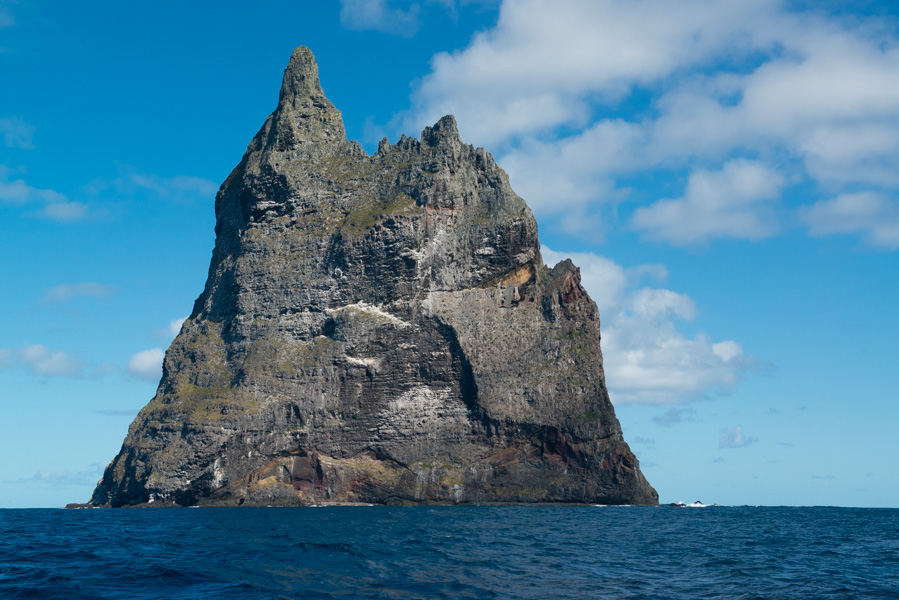
Ball's Pyramid

About Michael

Michael is an experienced and widely-published wildlife and nature photographer, writer, tutor, presenter and photography competition judge. His articles and images have featured in magazines such as Australian Photography +Digital, Australian Geographic, Wildlife Australia, Australian Birdlife as well as the BBC Wildlife, Nature TTL and WildArt (all based in the U.K.). His images have featured in numerous calendars, diaries, books and many other publications, including billboards and he has published two coffee table books on Australian wildlife. Michael is a Nikon School tutor in Queensland, Australia and regularly conducts wildlife and nature photography workshops and tours across Australia and the world.

Mmichael Snedic on Lord Howe

Sample itinerary

NB – The sample itinerary provided may be subject to change or variation due to prevailing weather conditions and/or other localised circumstances, that are out of the control of Michael Snedic.

Day 1

After arriving on Lord Howe and a quick settle-in at your accommodation at Ocean View Lodge, we will meet for introductions and a session titled “Getting to know your digital camera and settings”. Michael will also let you know what to expect from the week ahead


View from Malabar Hill - Lord Howe Island

Day 2

It’s up early for a pre-dawn shoot at Ned’s Beach, just a short distance from our base. Here you will photograph the sunrise over the beach, followed by a bird photography shoot on the beach

After breakfast, we’ll head off for a cruise onto the lagoon in a glass-bottom boat, which will include some snorkelling in one of the most renowned coral/fish areas in the world! You will see amazing coral reefs, as well as huge green turtles, rays, sea snakes and lots of incredibly beautiful fish, in all sorts of shapes and colours. Time to get those underwater compact cameras out :-))

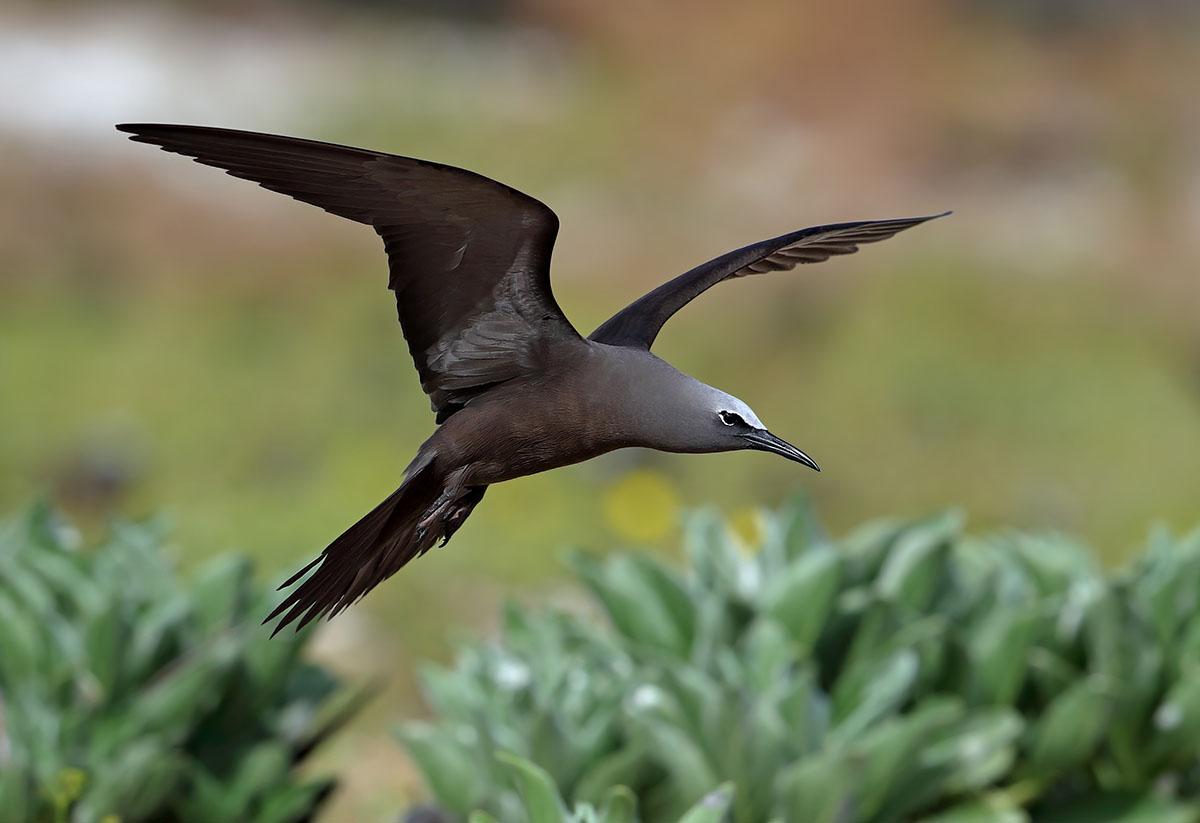
After our snorkel, we will land ashore and have morning tea, followed by a bird photography session. With the variety of birds on Lord Howe Island, we should find lots of subjects to photograph, including thousands upon thousands of Sooty Terns nesting on the beach, as well as Grey Ternlets and Common Noddys. This is followed by a walk up the Mt Eliza track, for a chance to photograph the spectacular views over the turquoise lagoon of North Bay, southward to the twin peaks of Mt Gower and Mt Lidgebird, as well as Sooty Terns at eye level! We will return via boat back to our starting point, close to our accommodation.
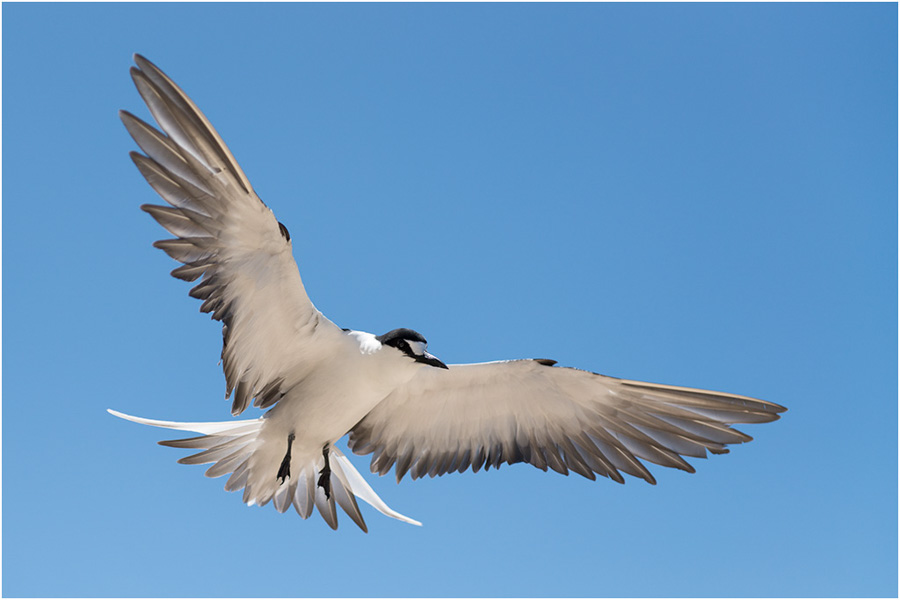
 

Sooty Tern

Day 3

After a sleep in and breakfast, Michael will present and audio-visual on wildlife and landscape photography. This will be followed by a trip out towards the southern end of the island for a combination of landscape and bird photography.

In the afternoon we will head to Lover's Bay for some more seascape photography and any birds we can find. These include Lord Howe island Woodhens, Golden Whistlers, Pacific Emerald Doves, Buff-banded rails and Silvereyes.


Day 4

Morning shoot at Blinky's Beach for a sunrise shoot and bird photography.

After breakfast, there will be an image critique session, where Michael will offer critique on photos taken so far.

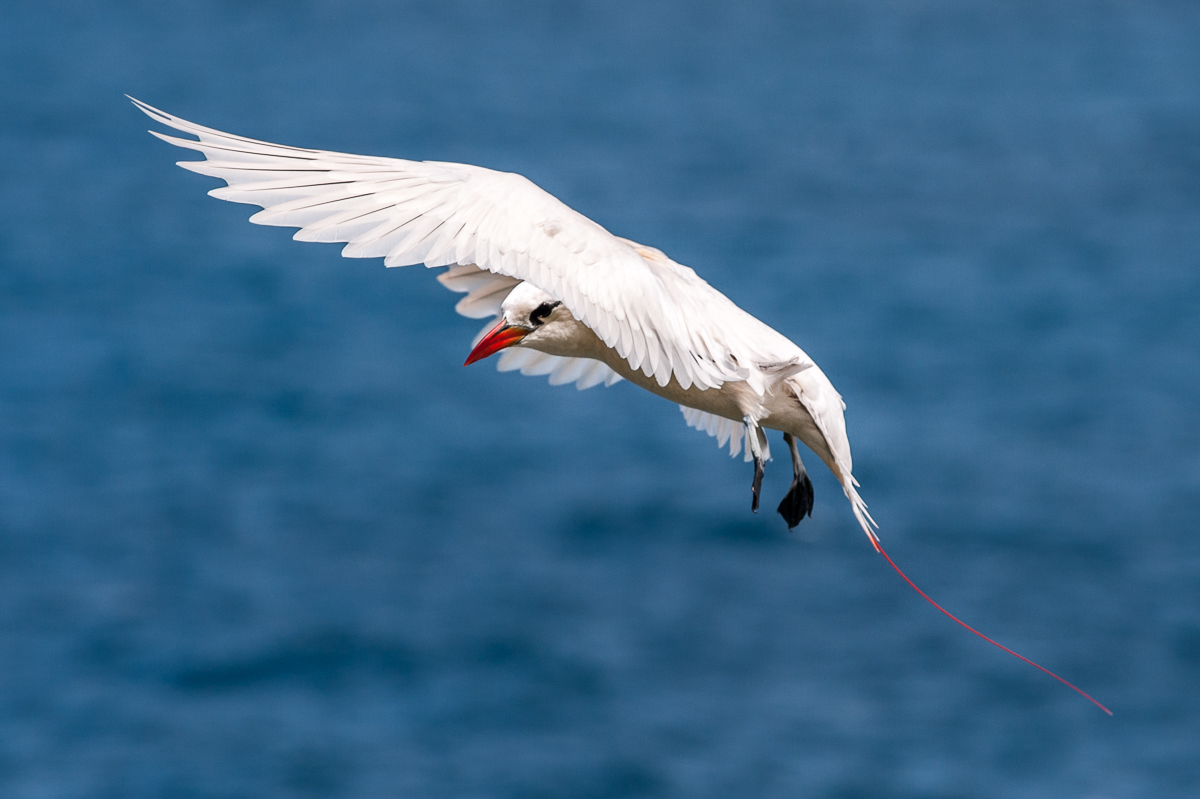
Late in the afternoon, we start our slow walk to the top of the sea cliffs at Malabar (situated just behind our accommodation). The cliffs themselves are spectacular and the views to the north across the Admiralty Islands are remarkable. Different bird species that frequent the clifftops include Masked Boobies, Red-tailed Tropicbirds and White Terns. On the way back, there will be a sunset shoot where you can get great shots overlooking the island, before heading back to base.


View from Mt Gower

Day 5

Free Day. This is your chance for your own personal explorations, or a time to relax. Options include a guided Mt Gower climb; a SCUBA dive; another snorkelling trip or fishing charter, or maybe a boat trip out to Ball's Pyramid. You could also revisit your favourite locations and subjects again with your camera, either on foot, by bicycle or hiring a car for a day.
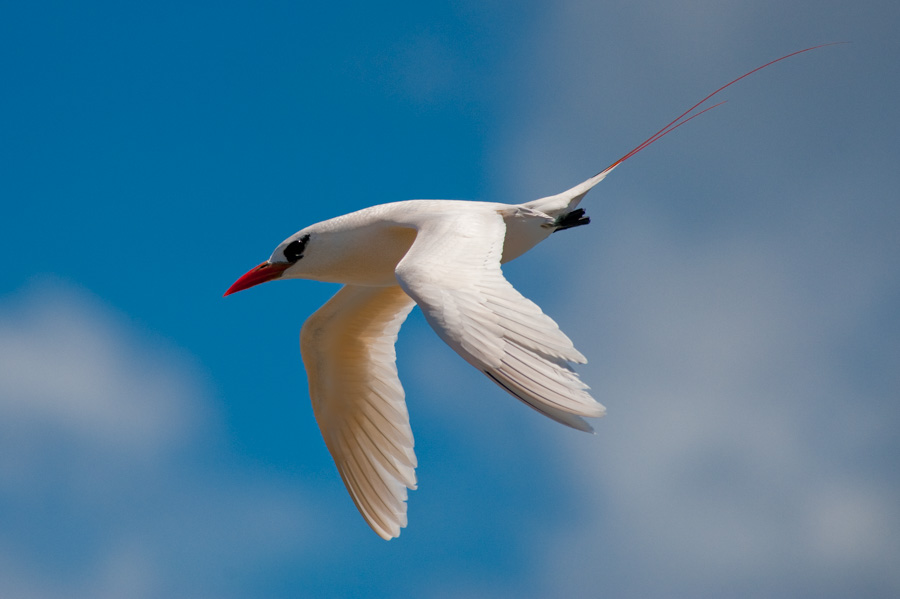


Red-tailed Tropicbird

Day 6

This morning we will head to the jetty to photograph the delightful White Terns as they hover and land on the Norfolk Island pine trees.

After breakfast, we spend time playing with light and shade in the palm forest called 'Valley of the Shadows'. Photogenic fig trees, with amazing aerial roots and buttresses, are one of the many forest highlights as well as more Woodhens.

Our final session is a seascape shoot from the jetty and along the shores near Signal Point.
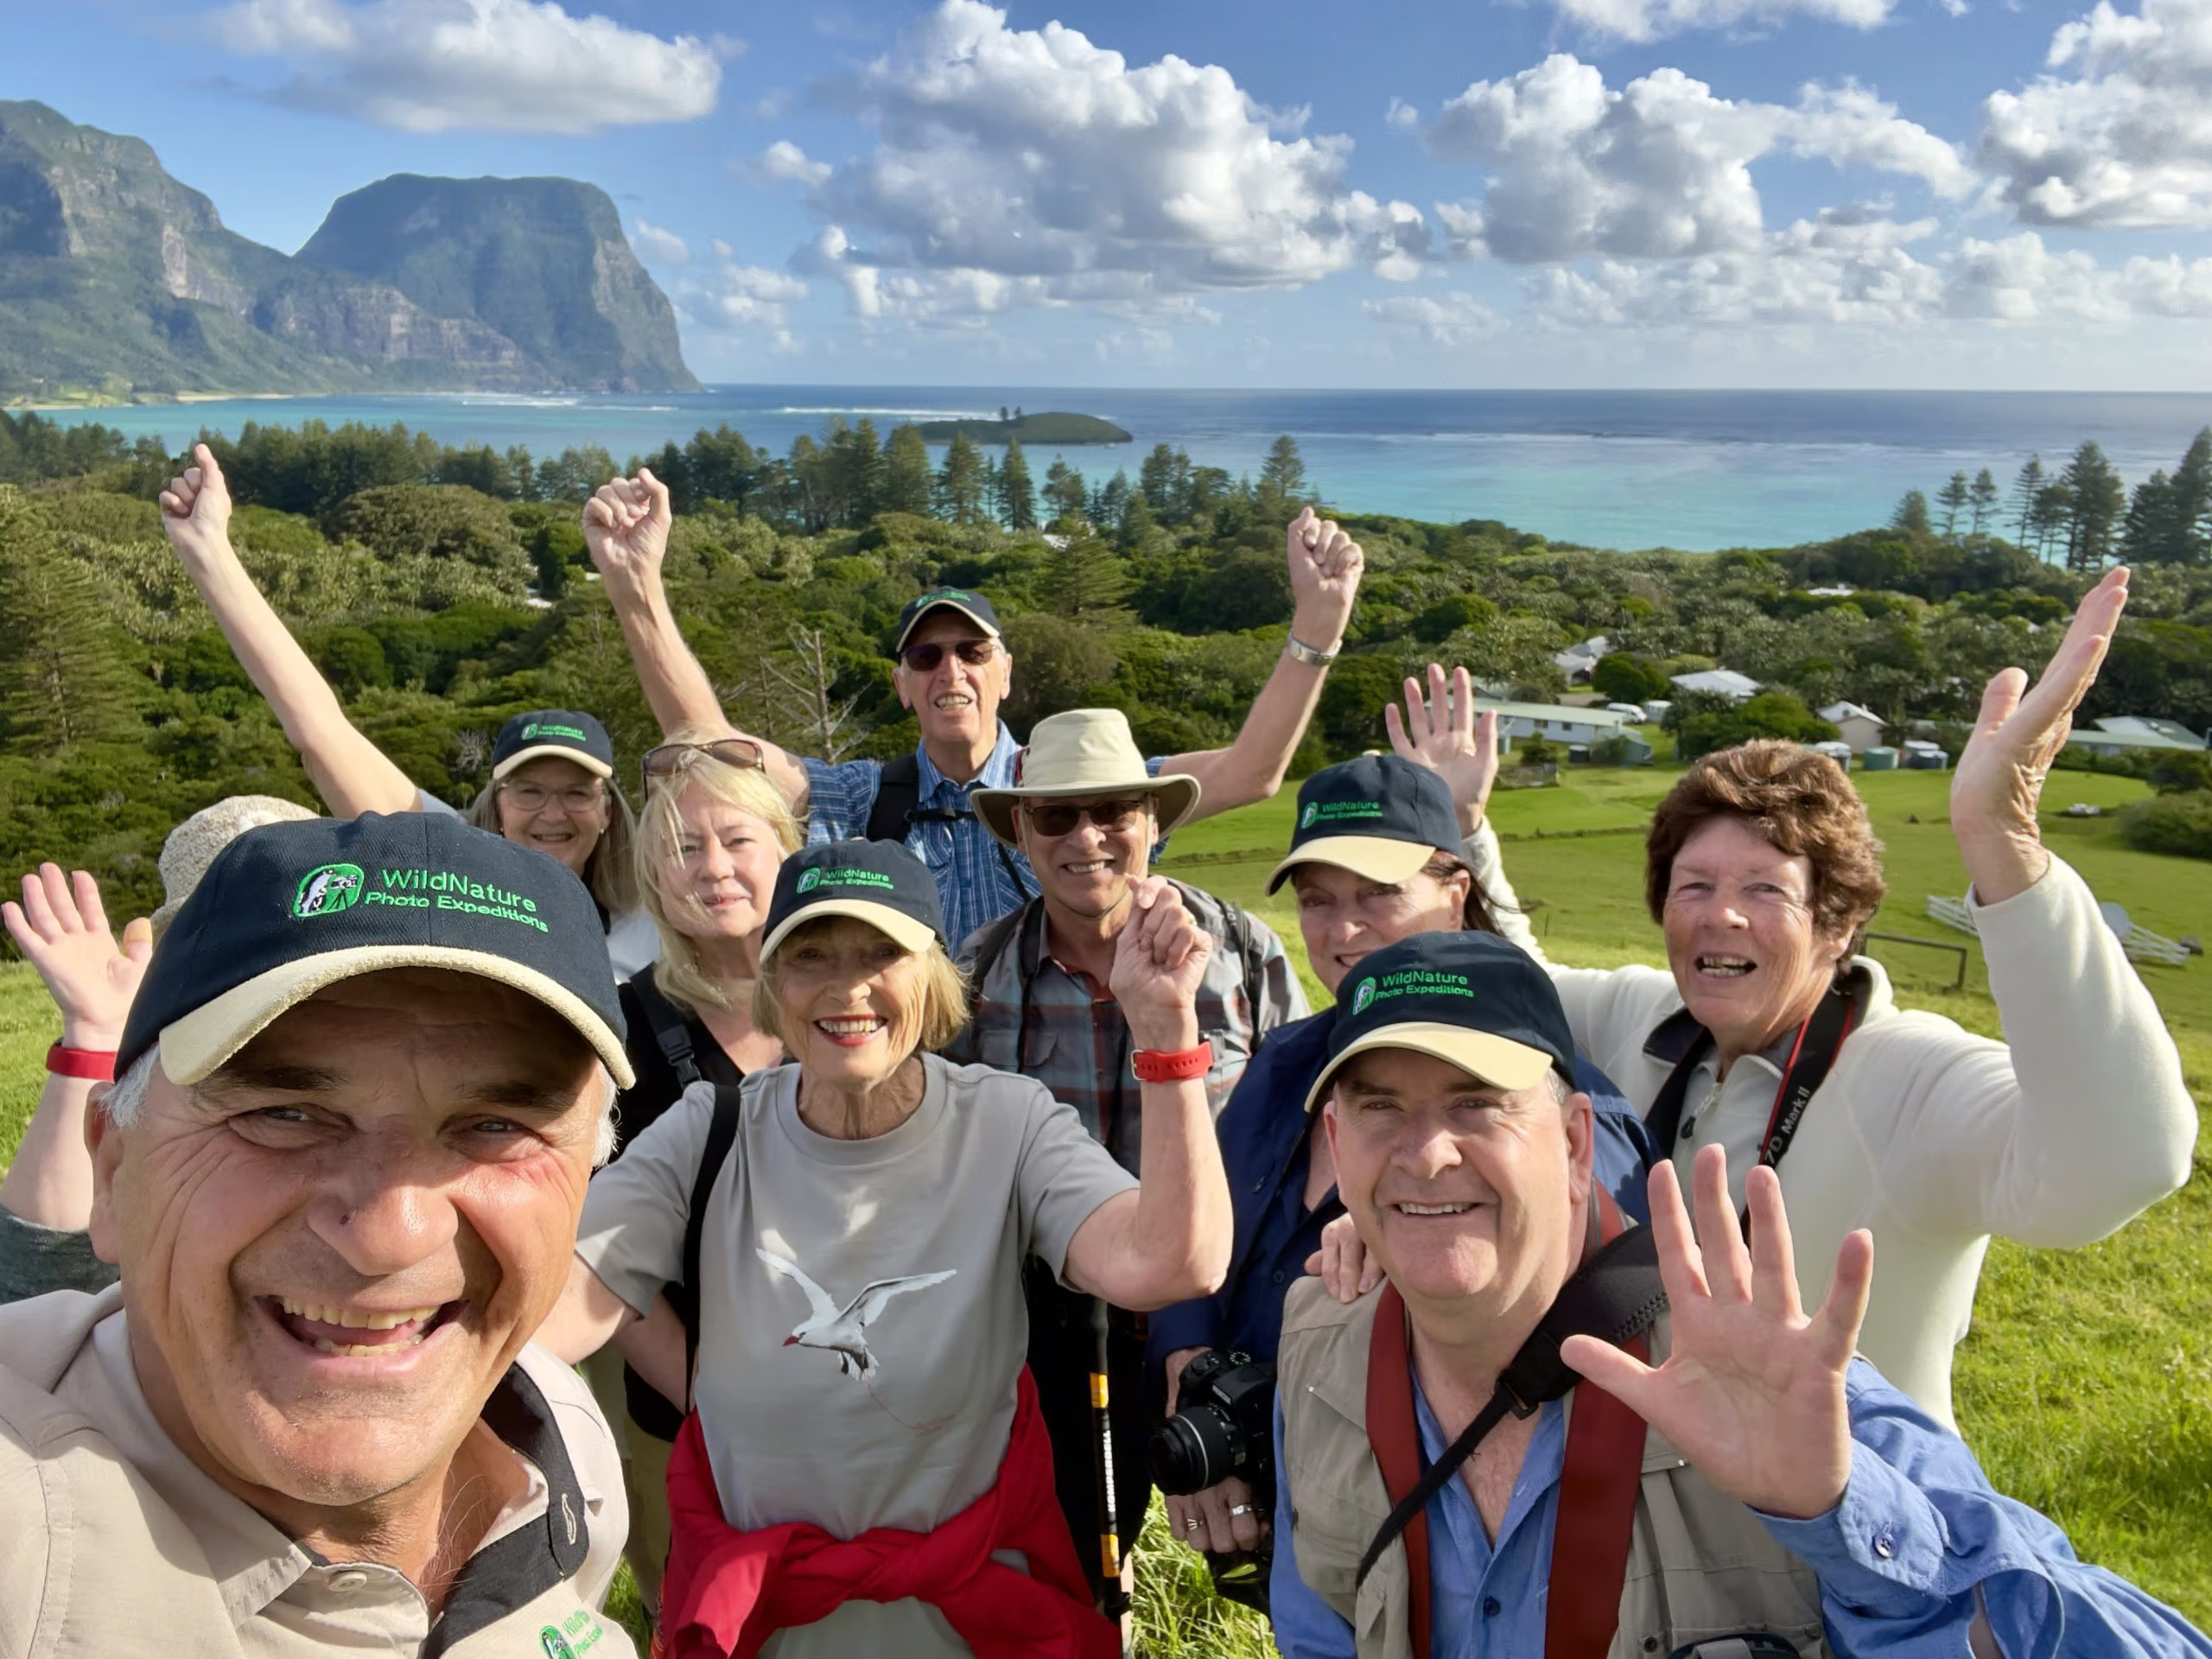
Group shot

Day 7

This morning you’ll have free time to pack and prepare for the trip home and say your goodbyes. Departures for home cities are at various times through the day.

No matter what your level of experience, Michael will help you gain valuable photographic technique that will ultimately lead to you taking better quality photos. With a professional wildlife and nature photographer and experienced photography tutor on hand throughout the week, there will be many opportunities to ask any photography-related questions, specific to your own personal needs.

Lord Howe photo workshop

Bookings and Contact:

To reserve your place or just to ask more questions about this photo expedition, please contact Michael either via his CONTACT FORM or by calling +61 408 941 965.

Your position on the tour will be guaranteed immediately upon payment of non-refundable deposit of $AU1400 (plus GST) The balance will be due up to 90 days prior to the start of the workshop.

Cancellation Policy:

Deposit is non-refundable. Cancellation up to 90 days before departure non-refundable or transferable. Cancellation between 90 and 60 days before departure - 50% of total workshop price forfeited. Cancellation less than 60 days before departure or during tour, no refund available.

Use of Perspective In Wildlife Photography – Part One

Use of Perspective In Wildlife Photography – Part One

Polar Bear and Reindeers_980x669


Perspective can make a huge difference when photographing wildlife. Basically, it can change how an image is perceived. A three-dimensional view can be turned into a two dimensional image, by either changing your lens or using a different angle or viewpoint from which you are shooting your subject. You are, in essence, impacting how the viewer of the photo interprets depth in the image they are looking at.

Traditional Methods

Traditionally, most wildlife images are taken with a fixed focal length telephoto lens such as a 300mm f2.8, 500mm f4 or 600mm f4, or by using one of the numerous zoom lenses available on the market. Many of the more popular lenses used in traditional wildlife photography include 100-400mm, 200-400mm, 200-500mm, 150-600mm etc. There are, of course, pros and cons with any of the above-mentioned lenses. Telephoto lenses are usually very sharp and have a wider minimum aperture. This means you can let in more light into your camera, which in turn means a higher shutter speed without needing to crank up the ISO too high (the higher the ISO, the more noise you will end up with). The downside is that these lenses are quite expensive, heavy and if you can’t move from the spot you are photographing (such as sitting in a safari vehicle in Africa, with a lion in front of you) you can’t change your focal length. With a zoom lens, you have more option to compose an image on the spot, they are generally cheaper in price and a bit easier to handhold, weight-wise. The downside here is that they may not be as sharp as a telephoto lens and the minimum aperture will often be smaller in size. For example, the Sigma and Tamron 150-600mm lenses are very versatile but in low light scenarios such as rainforests, the widest aperture you can achieve at 600mm is f6.3. This then slows the shutter speed quite a bit so in turn you have to raise your camera’s ISO considerably in order to get sharp shots.

Animals In The Environment

Apart from the traditional longer telephoto and zoom lenses, you can use a variety of different lenses to achieve a completely different view. Many of the renowned wildlife photography competitions around the world include a category called ‘Animals in the Environment’, where the animal(s) are a small part of a landscape. This gives the viewer a chance to see the animal in its natural environment. Images where you first see an amazing landscape, then realise there is an animal(s) can be quite pleasing on the eye. For the image of the four reindeer and a polar bear in Svalbard, the Arctic, featured in this article, I was in a zodiac with my photography tour participants and I saw the gorgeous light bringing out the blue in the icy landscape. As we approached a little bit closer, I only then noticed the animals. The important part here was to use a small (in size) aperture, therefore creating greater depth-of-field. By using a lens with a smaller focal length, I was able to photograph the landscape as well as the wildlife featured within that landscape. This type of image creates a true sense of scale which may not be evident when photographing the landscape on its own.

If you have a passion for African wildlife, nature or travel photography and would love to go on a specialised small-number, professional African photo safari, please get in touch with Michael Snedic at WildNature Photo Expeditions. You can call him on 0408 941 965 or fill in this Contact Form and he will get back to you ASAP.

8 Day Northern Territory Bird Photography Workshop

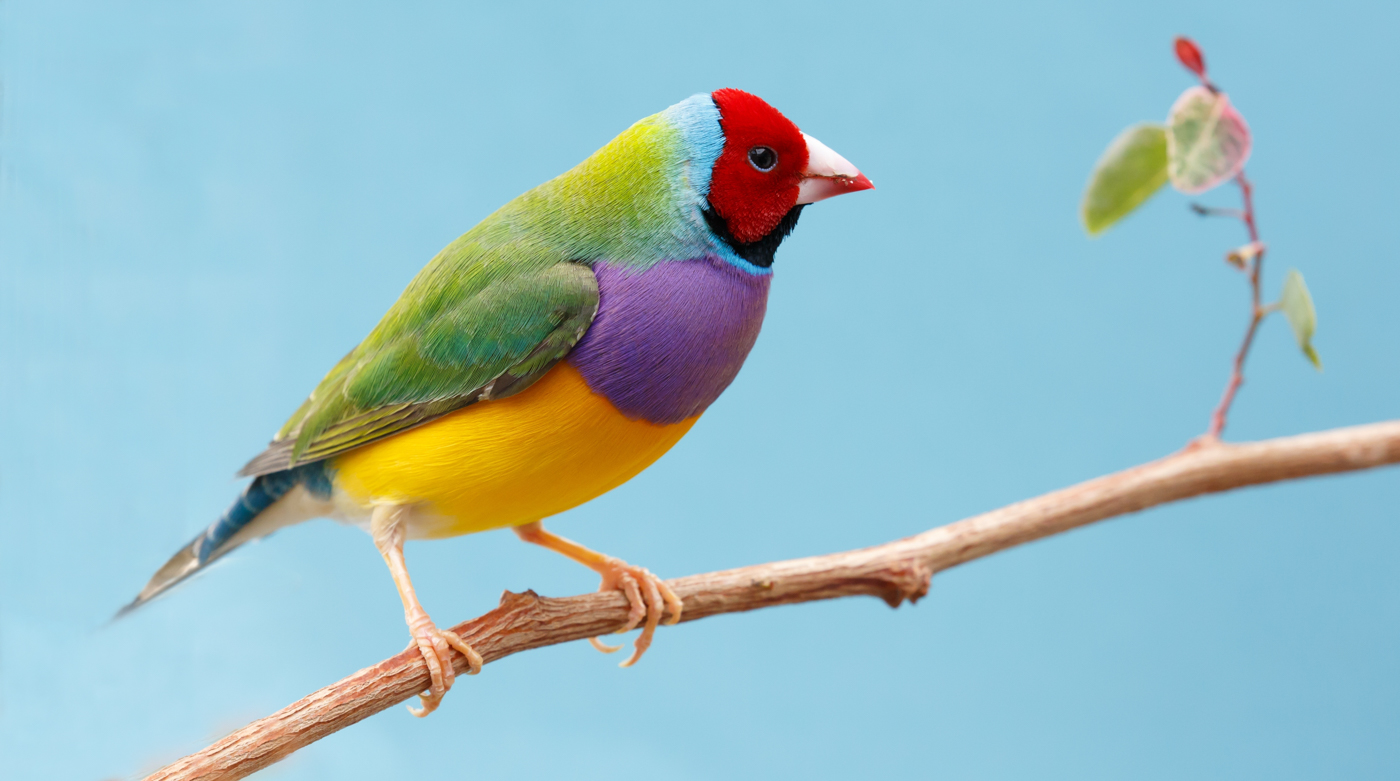
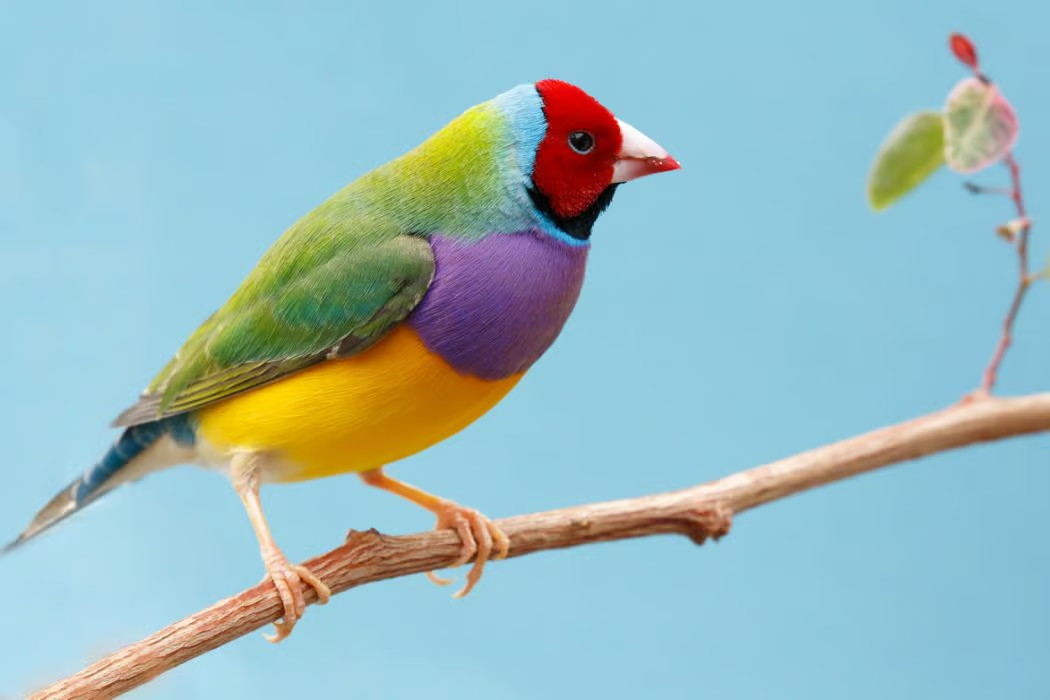
  • Beautiful Multi Colored Gouldian Finch Bird From Australia

About the Workshop and Tour

NEW

Capture a myriad of bird species in tropical North Australia with your camera, on this 8 day photographic adventure. This unique bird photography adventure has been designed specifically with photographers in mind. 

We’ll get the opportunity to photograph some of Kakadu’s 280 bird species, as well as the legendary saltwater crocodile and lotus plants. We have booked an exclusive-use private wetland cruise at Yellow Water, for our group.  


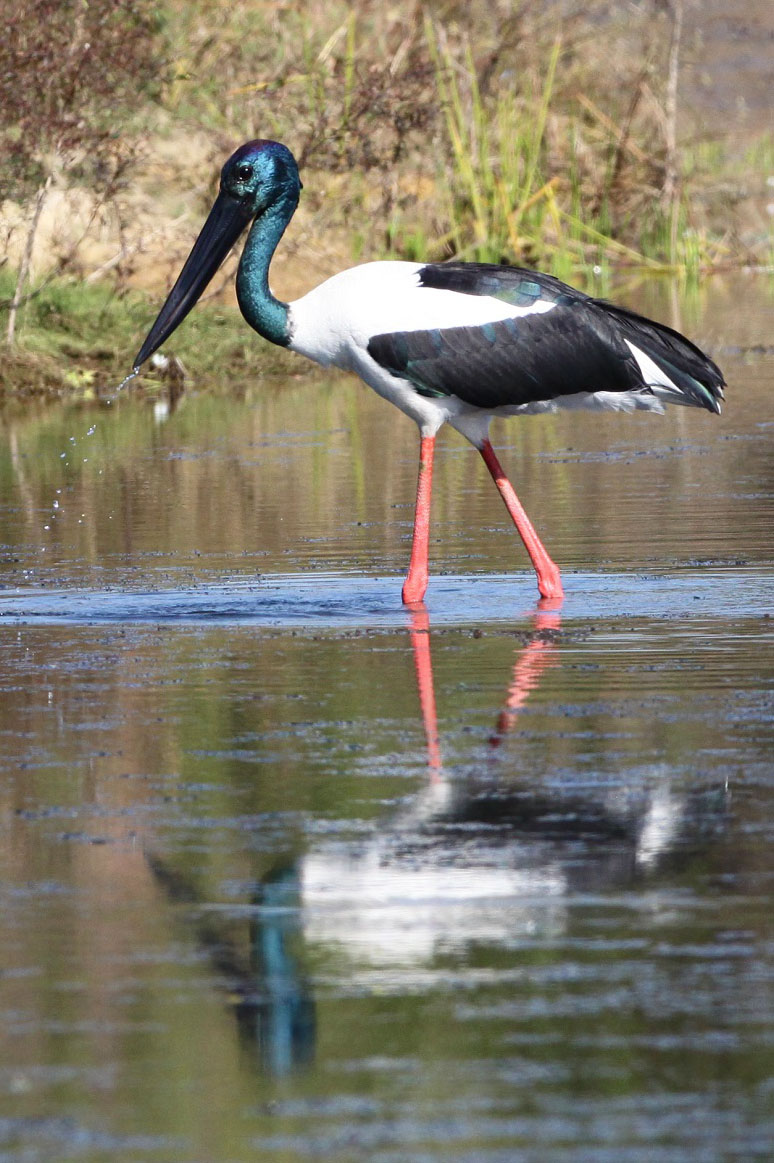
Jabiru

Price

TBA

Please note: WildNature Photo Expeditions will endeavour to find someone to share with you, from the photography group. If no one is available to share, then a single supplement will be added and you will have your own room.


Your Guides

Professional Photographer and Tutor, Michael Snedic and Experienced Birding Guide, Luke Paterson

Kakadu_Photo_Tour_7

Contact Michael Snedic directly
on +61 408 941 965

Meeting Point

Darwin - Northern Territory

Accommodation

As per itinerary

Transport

We will travel around the Northern Territory in a 11 seater bus, with luggage trailer

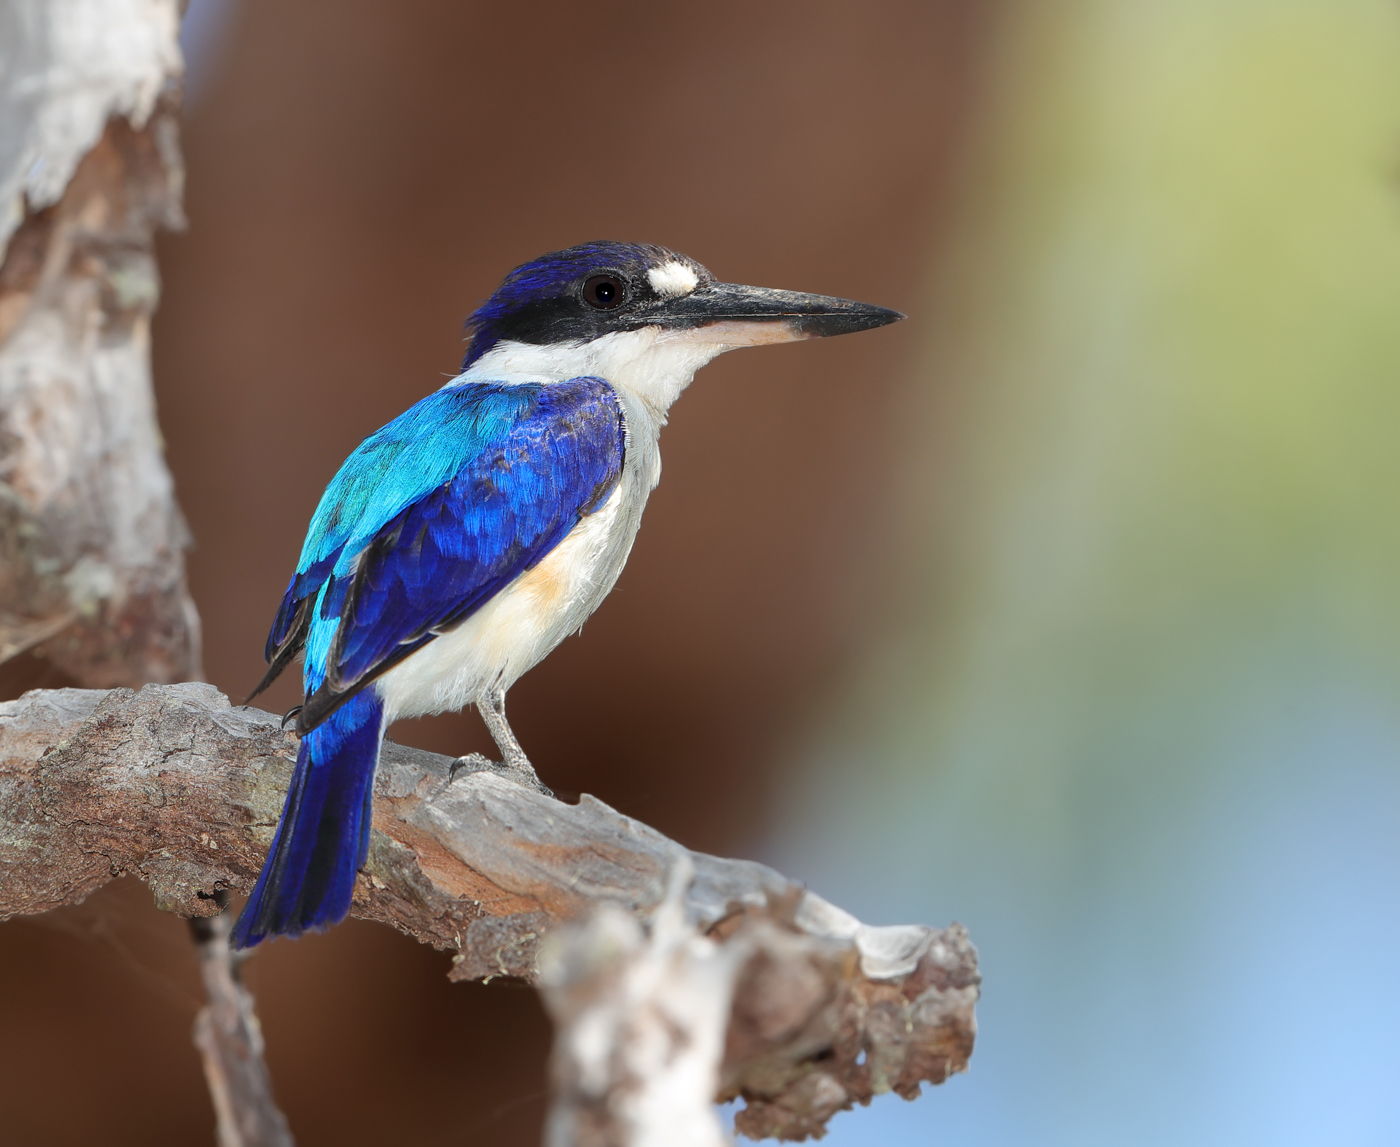
Forest Kingfisher (Todiramphus macleayii) at Abattoir Swamp in Julatten, Queensland, Australia. aAso known as the Macleay's or Blue Kingfisher

Photography Level

There is no “minimum level” required regarding photographic ability. Beginners and highly experienced shooters alike are all very welcome to join us. You will receive plenty of individual one-on-one time that will be geared towards your own personal skill levels and needs.

Kakadu_Photo_Tour_3

Inclusions

  • 8 days photography leader Michael Snedic, professional photographer and tutor
  • 8 days specialist accredited guide Luke Paterson, owner of NT Bird Specialists
  • 8 nights ensuite accommodation
  • 8 days private air-conditioned commercial tourist vehicle with driver (11 seater bus) with purpose-built 4WD trailer
  • 2 privately-guided rock art site tours
  • Yellow Water boat cruise (our own private boat)
  • All meals on tour
  • Unlimited cool water refills
  • Hotel transfers
  • Return Airport transfers
  • All National Park commercial touring permits, entry fees and exclusive-access Licens
  • Emergency communications, first-aid kits
  • Assurance of touring with an award-winning Australian Accredited Tourism Business an
  • Licensed Commercial Tour Operator
  • EcoStar Sustainable Tourism-accredited operators
  • Accessible Tourism-accredited operators
  • Complimentary pre and post-tour booking services

Northern Territory bird photography workshop_15

Exclusions

  • Flights and excess baggage
  • Pre and post tour meals and accommodation not stated in itinerary
  • Comprehensive travel insurance (recommended)
  • Alcoholic & evening beverages. (BYO is available in some places but may be restricted in others).
  • Laundry, personal shopping, phone calls, gratuities and other items not stated in itinerary are excluded

White-bellied Sea Eagle foraging in the sea

Itinerary

Day 1 – Darwin

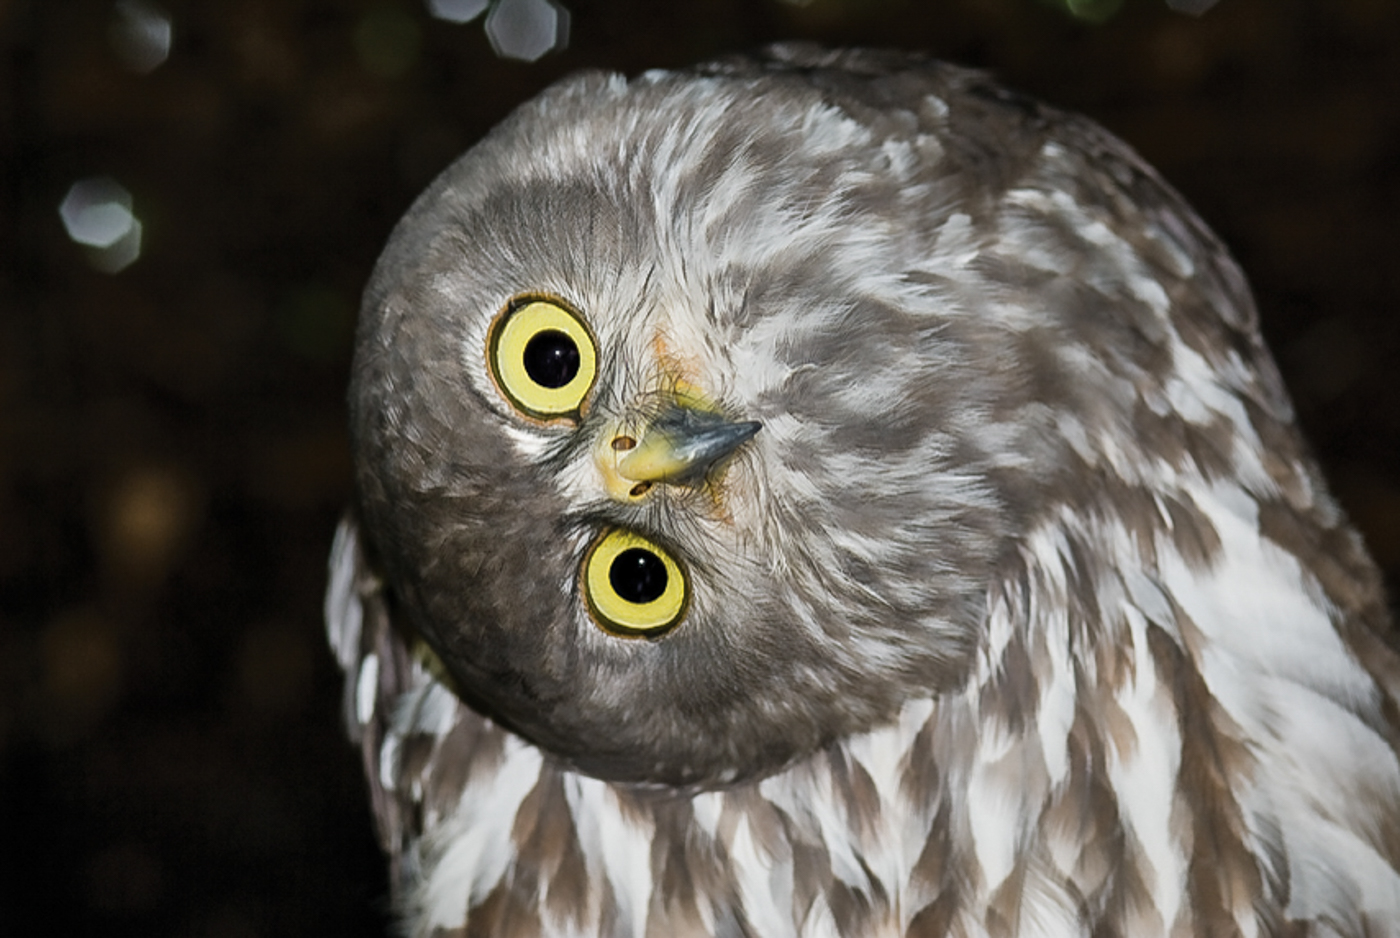
Meet in Darwin at 2pm and make our way to an afternoon session at the Darwin Botanic Gardens (Rufous ad Barking Owl, Figbird,).

Accommodation: Mercure Darwin Airport Resort for 2 nights.
Dinner included.

Beautiful Multi Colored Gouldian Finch Bird From Australia

Day 2 – Darwin

We will spend the day visiting a variety of sites which may include Holmes Jungle, East Point, Lee Point and Buffalo Creek. Birds we’ll seek to photograph include Rainbow Pitta, Arafura Fantail, Northern Fantail, White-gaped Honeyeater, Forest Kingfisher, Silver-crowned Friarbird and Paperbark Flycatcher. In the mangroves at Buffalo Creek Red-headed Honeyeaters, Green-backed Gerygone, Lemon-bellied Flycatcher, Grey Whistler, Red winged Parrots and Common Sandpiper are found and the rarely seen Chestnut Rail.

Various seabirds and waders are also possible. We will visit the Botanical Gardens to look for Rufous and Barking Owls.

Breakfast, lunch and dinner included.

A close-up shot of a salt water crocodile (Crocodylus porosus) with reflection in the water

Day 3 - Fogg Dam and Kakadu National Park

With packed breakfast, we drive to Fogg Dam with its spectacular diversity of water birds including Comb-crested Jacanas, Black-necked Stork, Magpie Geese, Straw-necked and Glossy Ibis, Pied Heron, Plumed and Wandering Whistling Ducks, Green Pigmy Geese, Whiskered Tern, Caspian Tern and Brahminy Kite. Saltwater and Freshwater Crocodiles are also found here.

A boardwalk on the edge of the lake is a good place for Rainbow Pitta, Little Kingfisher, Rose-crowned Fruit-Dove, Shining Flycatcher, Little Bronze-Cuckoo, Rufous-banded Honeyeater and Broad-billed and Lemon-bellied Flycatcher

Along the Arnhem Highway we will keep an eye out for for Crimson, Long-tailed, Double-barred and, if we are very lucky, Gouldian Finches. A stop at Adelaide River could produce Mangrove Golden Whistlers and along the route Black-faced Woodswallow, Marsh and Spotted Harriers, Black-shouldered Kites, Nankeen Kestrels, Black-breasted Buzzard, Red-backed Kingfisher are among the possible species.

The first planned stop in World Heritage listed Kakadu National Park is Mamukala Wetlands where the numbers of water birds can be spectacular and there may be the possibility of seeing some species not seen at earlier sites.

In Kakadu,  we go to Jabiru to stay at the Anbinik Kakadu Resort, which is owned by a local Aboriginal corporation,  to check in to our accommodation. Time permitting, After dinner in Jabiru we look for Barking Owls.

Accommodation: Anbinik Resort for 3 nights.
Breakfast, lunch and dinner included.

Northern Territory bird photography workshop_2

Day 4 - Kakadu National Park

A private dawn cruise on the famous Yellow Waters Billabong is the perfect start to the day. The early flights of the waterbirds are a great spectacle. After breakfast at Cooinda spend time photographing   the wildlife close to Cooinda. Back in Jabiru we visit the Bowali Visitors centre then have lunch. After a break in the middle of the day travel north to the Bardedjilidji walk and the art sites at Ubirr. Sunset at Ubirr is a Kakadu tradition and a great way to finish the day. Birding highlights include species previously listed and  Long-tailed, Double-barred and Crimson Finches and many more. Amongst the sandstone outcrops two special locals are the Chestnut-quilled Rock-Pigeon and Sandstone Shrike-thrush. Mammals seen here include Common Wallaroo, Agile Wallaby, Wilkins Rock Wallaby and Sandstone Antechinus. At nearby Cahills Crossing, the causeway across the East Alligator River to Arnhemland, Saltwater Crocodiles are commonly seen in big numbers.

Breakfast, lunch and dinner included.

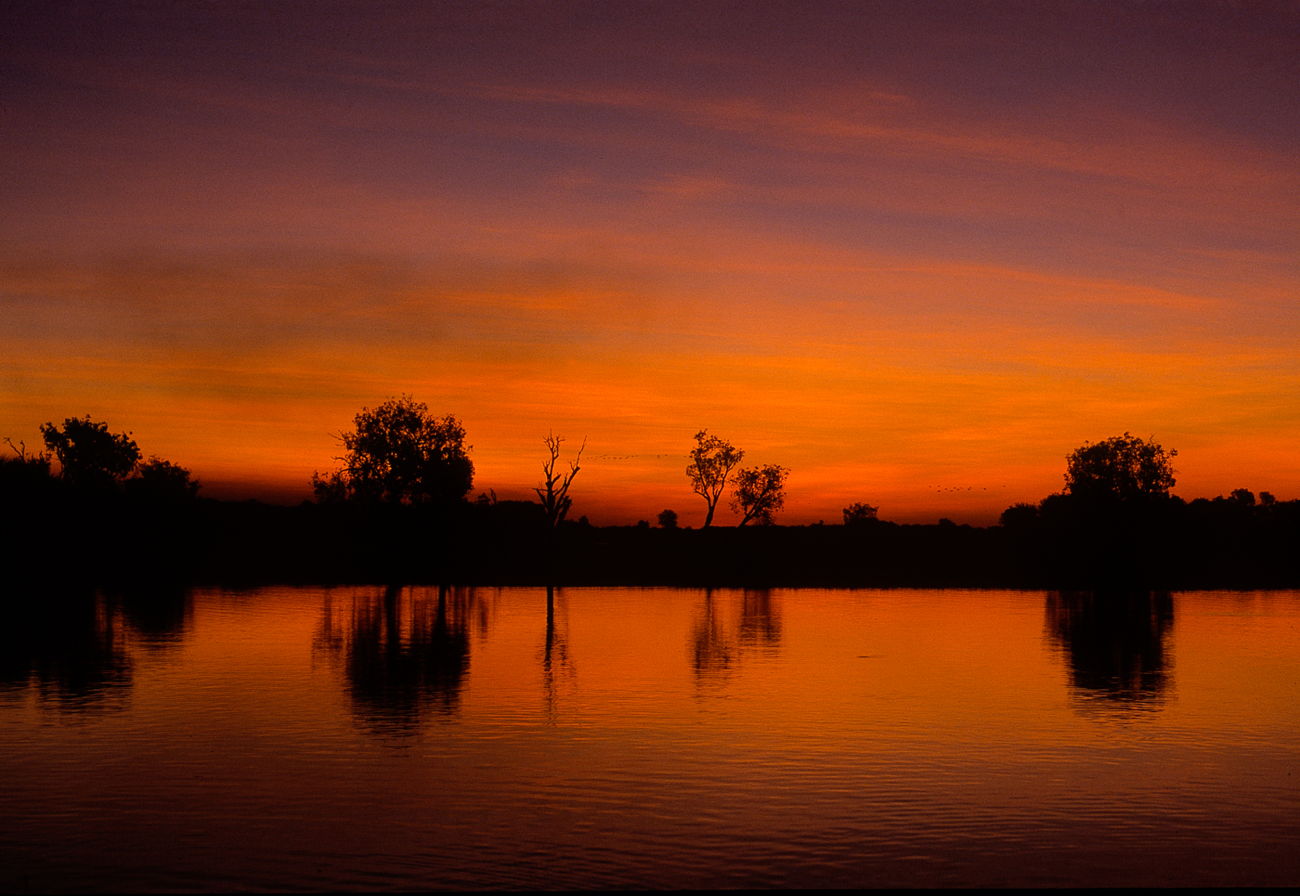
Sunset over Yellow Water

Day 5 – Kakadu National Park

Have an early start to get to Burrungkuy and Angbangbang Billabong when the birds are most active. Another highlight there would be seeing, and photographing, the Black Wallaroos that are endemic to the Arnhemland Plateau. This is a good location for the locally endemic Banded Fruit-Dove, White-lined Honeyeater, plus Chestnut-quilled Rock-Pigeon and Partridge Pigeon. In the afternoon we will explore any areas where the birds are active.

Breakfast, lunch and dinner included

Kakadu_Photo_Tour_8

Day 6 – Kakadu and Pine Creek

Travelling further south through Kakadu towards Pine Creek provides the opportunity to look for two of Australia’s rarest raptors, the Grey Falcon, which has almost mythical status because it is so elusive, and the Red Goshawk. Brown Goshawks, Australian Hobby, Black-breasted Buzzard, Whistling Kites, Collared Sparrowhawk and Black and Brown Falcons are also found in this area. Masked Finches, Weebills, Black-tailed Treecreepers, Brown Quail, Brush Cuckoo, Black-eared Cuckoo and Variegated Fairy-wren are all possible at random roadside stops. The little town of Pine Creek where we stay the night is a good location for Hooded Parrot, Varied Lorikeet, Cockatiel, Sulphur-crested Cockatoo, Northern Rosella, Red-collared Lorikeet, Diamond Dove, Striated Pardalote, Magpie Lark, Crested Pigeon, Black-chinned, Blue-faced and White-throated Honeyeater, Crested Shrike-tit, Owlet Nightjar and sometimes Gouldian Finches.
The nearby sewage treatment plant is home to Australian Pratincole, Black-fronted Plover, Black-winged Stilt and Grey Teal whilst Chestnut-backed Buttonquail have been seen at the nearby
cemetery.

Accommodation: the Pine Creek Railway Resort for 2 nights.
Breakfast, lunch and dinner included.

Kakadu_Photo_Tour_4

Day 7 – Edith Falls

A very early start will be necessary today to go to the Edith Falls area to be ready for dawn at a location where beautiful Gouldian Finches and a many other species come for a morning drink. Red-winged Parrots, Hooded Parrots, Cockatiels, Rufous Whistlers, Black-tailed Treecreepers and Long-tailed and Crimson Finches are regular visitors to the waterhole. Just down the road is Edith Falls, a good spot for lunch and wildlife such as Merton’s Water Monitor, Golden Orb Spider & Agile Wallaby birds.

Drive south to Katherine Gorge in Nitmiluk National Park for a photo shoot around the nationalpark grounds, visitor centre for wildlife such as Agile Wallaby, Black Flying Fox and Firetail Skink, and head up to the lookout for stunning scenery/landscapes before heading back to Pine Creek for the night.

Breakfast and dinner included.

Yellow Water - Kakadu N.P. - Northern Territory

Day 8 –Edith Falls and Darwin

An early start to have another visit to Edith Creek to look for Finches and other species then travel back to Darwin via Adelaide River where the Silver-backed Butcherbird is often seen near the beautiful war cemetery. This beautiful bird is only found in the Top End and Kimberley regions. The tour will conclude this afternoon when returning to your accommodation in Darwin.

Accommodation: 1 night at the Mercure Darwin Airport Resort

Breakfast and dinner included.

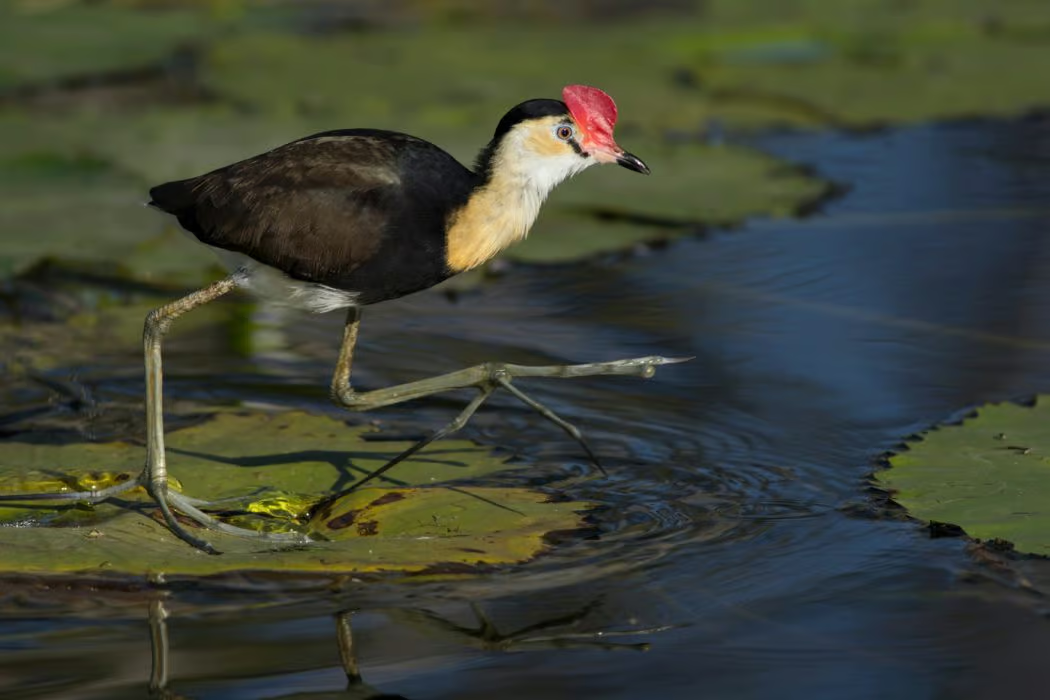
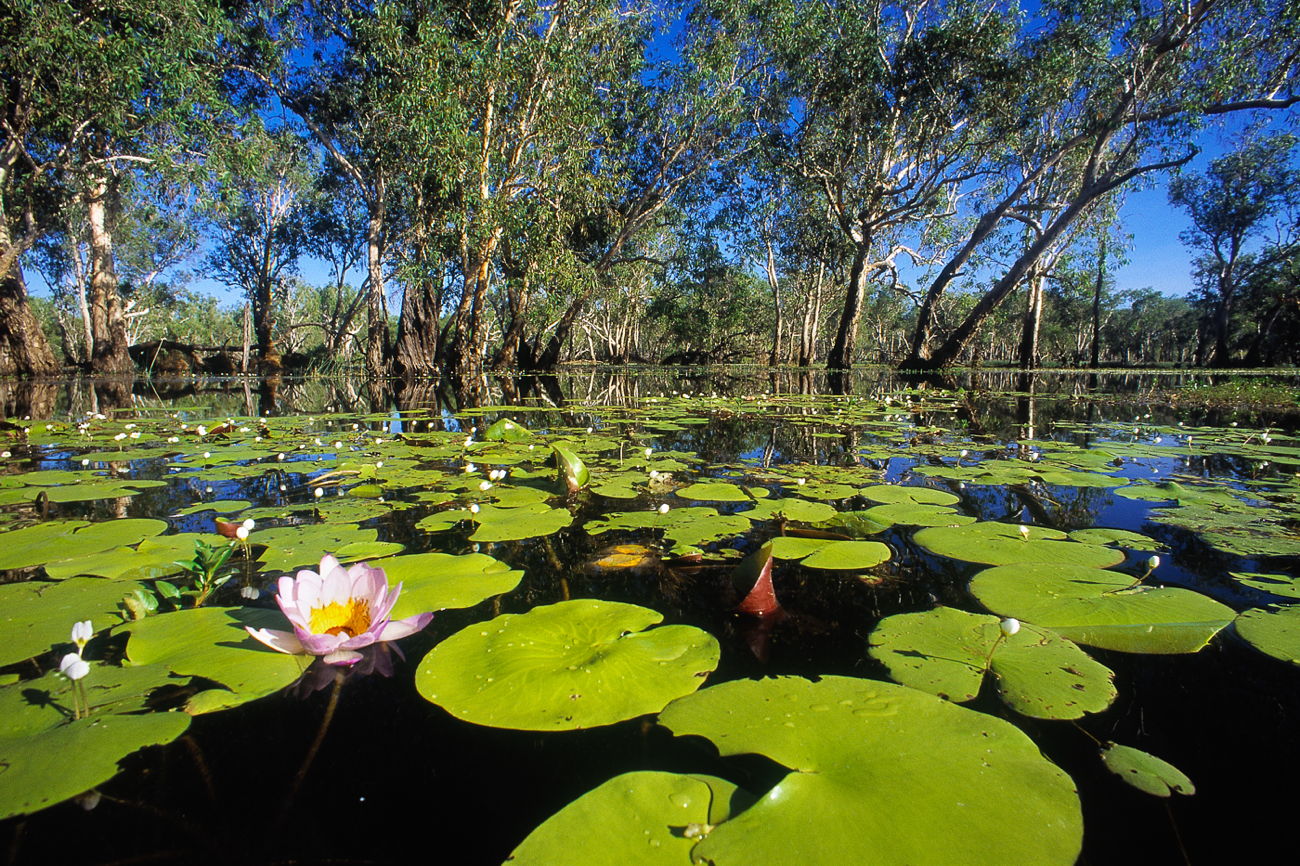
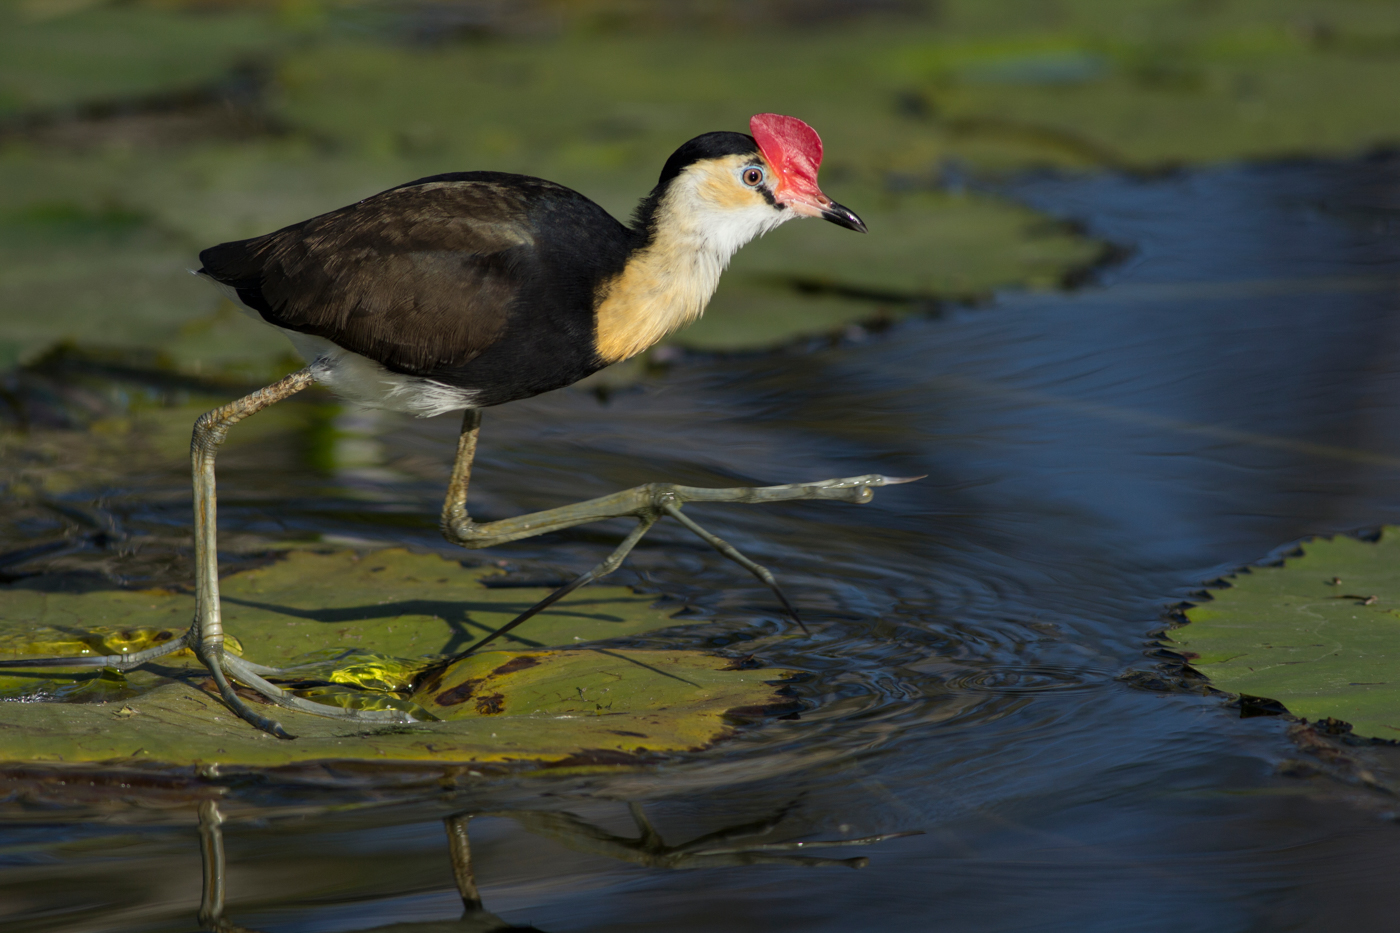
Comb- crested Jacana stepping across a gap in the lily pads on a lake in Australia

To Make A Booking

Please contact Michael to be sent payment details

Your position on the tour will be guaranteed immediately upon payment of non-refundable deposit of AU$1200 (plus GST). The balance will be due 90 days before the start of the workshop date.

Cancellation Policy

  • Cancellation up to 91days before departure, deposit non-refundable or transferable.
  • Between 90- 61 days if you cancel the whole tour, there will be a 50% cancellation fee
  • If the whole tour is cancelled within 60 days prior to departure, 100% cancellation fee applies.
6 Day Lady Elliot Photography Adventure

6 Day Lady Elliot Photography Adventure

  • Lady Elliot Island Photo Workshop

TBA

About the Workshop and Tour:

Join professional wildlife and nature photographer and tutor, Michael Snedic, for six amazing days of photography and tuition on  stunning Lady Elliot Island!

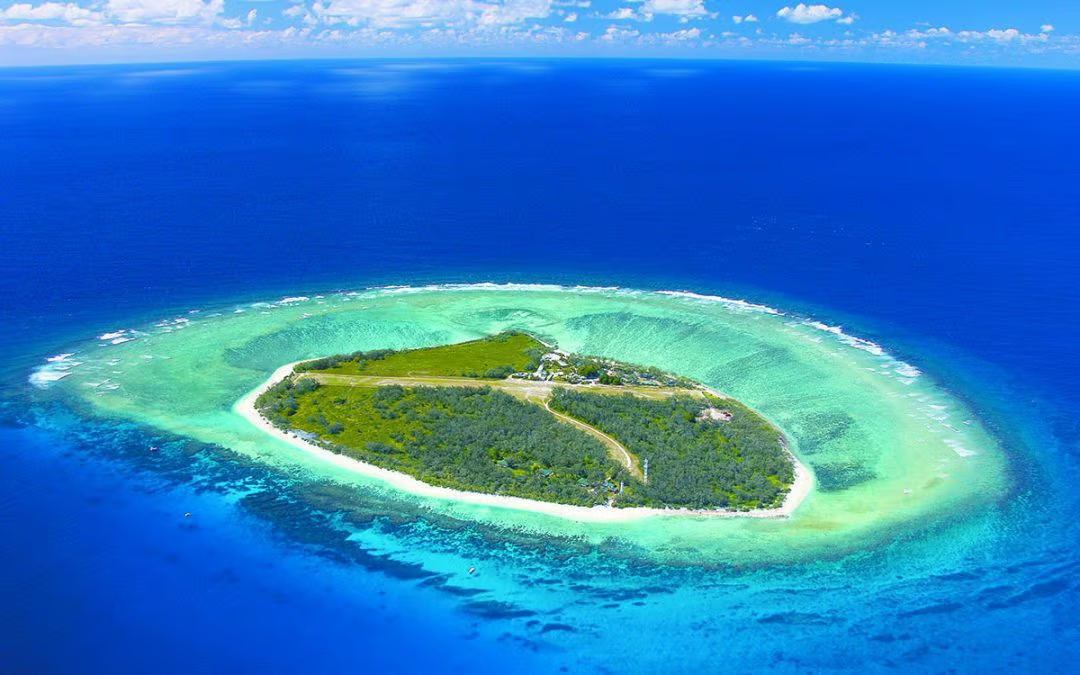
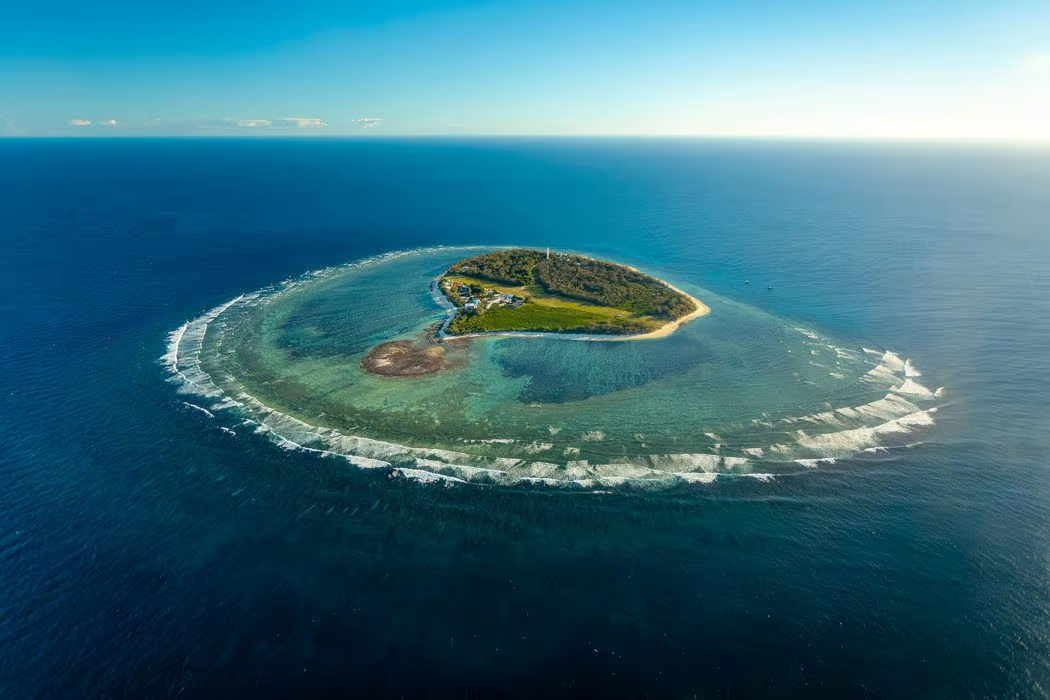
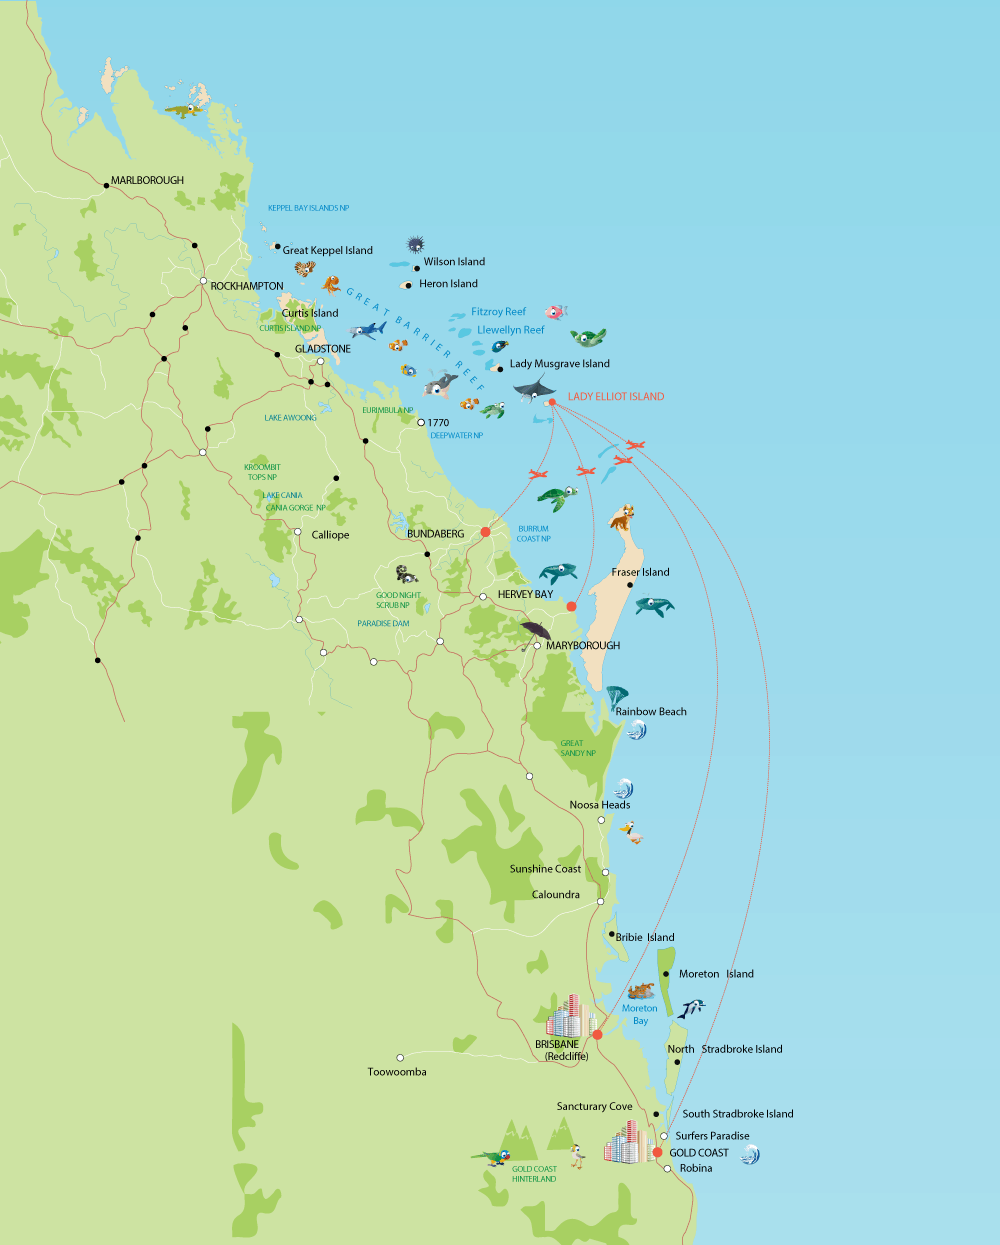
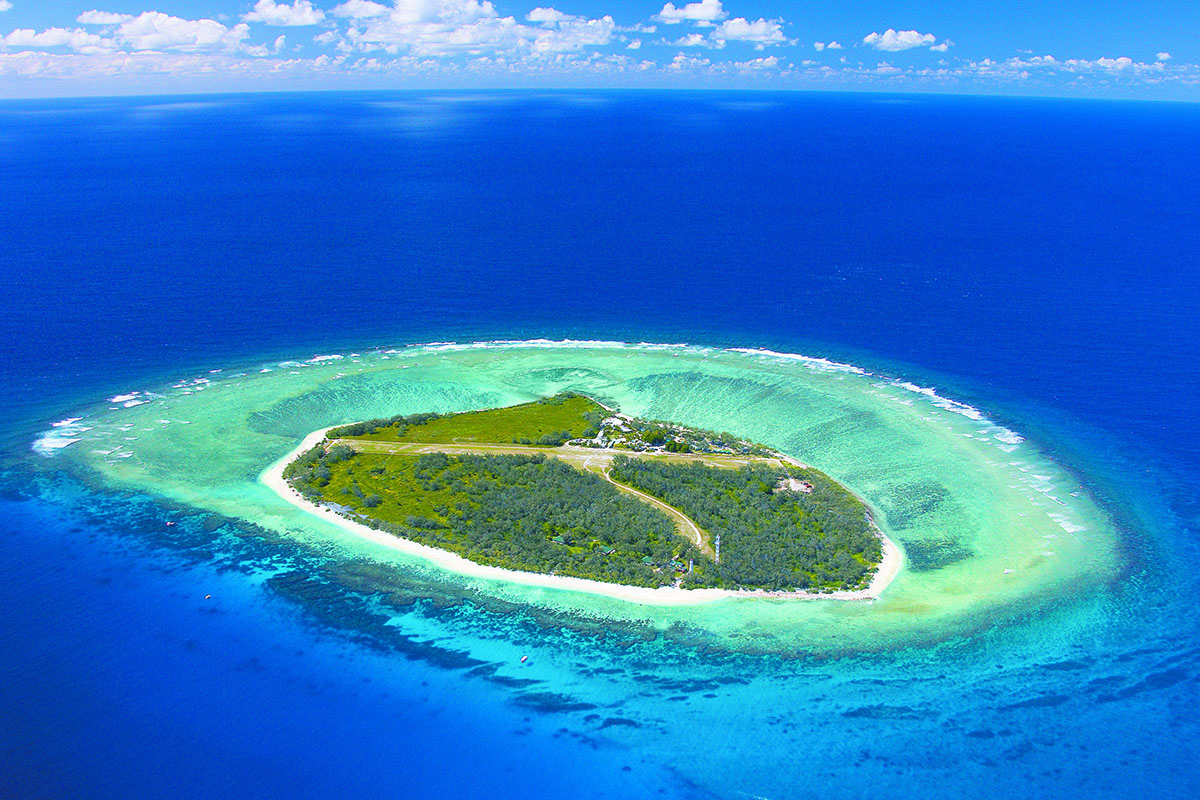
NEW Lady Elliot Island is a coral cay situated at the southern tip of the Great Barrier Reef. We are located approximately 80 kilometers north-east of Bundaberg and nestled in between Fraser Island and Lady Musgrave Island. Lady Elliot is the closest Great Barrier Reef island to Brisbane, Queensland’s southern capital. The Island lies within a Marine National Park ‘Green Zone’ and forms part of Australia’s World Heritage Listed Area on the Great Barrier Reef.


When:

TBA (six days/five nights)

Where:

Lady Elliot Island - Great Barrier Reef

Cost:

$AUTBA (plus GST) per person twin share (Single Supplement available for $TBA plus GST)

Please note: WildNature Photo Expeditions will endeavour to find someone to share with you, from the photography group. If no one is available to share, then a single supplement will be added and you will have your own room.

      Maximum participants: 8


Lady Elliot Island Photo Workshop

Contact Michael Snedic directly
on +61 408 941 965

Departure Point:

We will fly to Lady Elliot Island from Redcliffe airport in Queensland

Accommodation:

5 nights at the Lady Elliot Island Eco Resort

Lady Elliot Island Photo Workshop

Photography Skill Level:

There is no “minimum level” required regarding photographic ability. Beginners and highly experienced shooters alike are all very welcome to join us. You will receive plenty of individual one-on-one time that will be geared towards your own personal skill levels and needs.

Lady Elliot Island Photo Workshop

Inclusions:

  • 5 nights accommodation at the Lady Elliot Island Eco Resort
  • All meals on Lady Elliot Island
  • Return flights from Redcliffe, Queensland (valued at AUD$790)
  • Professional photography tuition by Michael Snedic
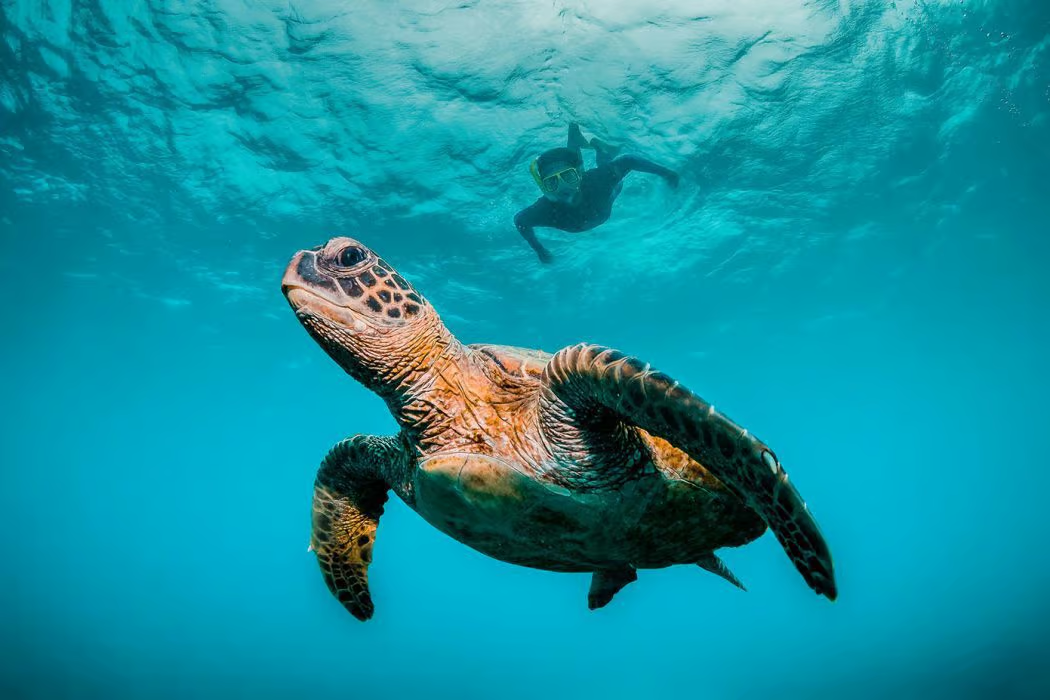
  • Glass Bottom Boat/Snorkel Tour
  • Snorkelling equipment – mask,snorkel and fins & lesson if required
  • Environmental Management Charge


Lady Elliot Island Photo Workshop

Exclusions:

  • Transport to and from Redcliffe airport
  • Hotel “in-room” expenses
  • Other personal expenses such as alcoholic beverages and barista made coffees
  • Accommodation at Redcliffe before and after tour


Lady Elliot Island Photo Workshop

About Your Photography Tutor:

Michael Snedic

Michael Snedic, Professional Photographer and Proprietor of WildNature Photo Expeditions, has been passionate about the natural world since he was very young and has now been photographing wildlife and nature for twenty years. He is one of Australia’s most accomplished and published nature photographers, his images having won numerous awards. Michael’s images have been published across Australia and the world, in hundreds of publications. He has also written many dozens of magazine articles on nature/photography since 2001, including Australian GeographicWildlife AustraliaBirdlife Australia, the UK’s BBC Wildlife and Australian Photography (Australia’s largest-selling photography magazine) which he has been a feature writer for since 2006.

Michael is honoured to be Queensland's only Nikon School Tutor (but is proficient in all camera makes and brands)

Michael Snedic Pro Photographer and Tutor

Itinerary:

Day 1

You will leave from Redcliffe airport (Qld) to Lady Elliot Island. With your camera ready, you may be able to take shots of this beautiful island from the air. Once you arrive on the island, you will have time to settle in to your room. We will then have a group briefing, where Michael will assess participant's photographic skill levels. Camera menus will be set up, if required, then we will head out and explore the island with our cameras.The landscapes and numerous birds will all be fodder for your cameras!

Today, Michael will also present a sunset photography session.

Days 2, 3, 4 and 5

There will be plenty of different photography sessions over days 2, 3, 4 and 5. We will do a sunset shoot or two, landscape shoots, LOTS of bird photography as well as macro. There will also be an audio visual session and some image critique, as per usual with a multi day WildNature Photo Expeditions workshop. You will also have free time to wander this gorgeous island with your camera. The thousands of birds on the island are quite used to people, so you will have lots of opportunities to get some very close shots : - ))

Thought the workshop, Michael will make sure you are capturing the best possible images of this incredibly photogenic island. There will be structured group sessions, as well as one-on-one time with workshop participants.

Lady Elliot Island Photo Workshop

Day 6

We will do another early morning sunrise as well as more bird photography.

Lady Elliot Island Photo Workshop

Lady Elliot Island Photo Workshop

Lady Elliot Island Photo Workshop

Lady Elliot Island's Weather

The average water temperature on Lady Elliot Island in October is 23.4 degrees C. It is definitely suitable  for swimming. The warmest water temperatures on the island in October are 24.8 degrees C , with the coldest water temperature being 21.8 degrees C.


Things To Bring

Al list of suggested items to bring will be forwarded to you after you have booked a spot(s). This will include photographic equipment as well as clothing etc.

Lady Elliot Island Photo Workshop

To Make A Booking

Please contact Michael to be sent payment details

Your position on the tour will be guaranteed immediately upon payment of a deposit of AU $TBA (plus GST) The balance will be due up to 90 days prior to the start of the workshop. 

Cancellation Policy: Cancellation up to 90 days before departure - deposit non-refundable or transferable. Cancellation between 90 and 30 days before departure - 50% of total workshop price forfeited. Cancellation less than 30 days before departure or during tour, no refund available.
WildNature COVID 19 Cancellation Policy:

In the event of the cancellation of the photography workshop, or you are unable to travel to the state of the workshop or tour due to Government-imposed travel restrictions, specifically due to COVID 19, you will be eligible for the following:


  • A full refund, less any cancellation fees incurred by the operator from the tour accommodation and activity suppliers.
Wildlife Photography Composition Tips

Wildlife Photography Composition Tips

Baby Elephant Seal

1. Avoid Placing Your Subject in the Centre of the Frame

Many wildlife photographers, when beginning their photography, place wildlife directly in the centre of the frame. If at all possible, avoid doing this. Instead, compose your image so that the animal’s face is across the intersecting ‘rule-of-third’ lines. If you place the subject in the centre, it often forces the viewer’s eyes to stay on the subject, which can end up producing a very average image. By composing your subject off-centre, it makes for a much more pleasing image, as the viewer will tend to look at what else is surrounding the subject.

2. Shoot at Eye Level

From the very beginning, when I started learning about wildlife photography some 25 years ago, I was told by my photographic mentor to ‘shoot at eye level’. Rather than standing up and pointing your camera and lens down onto an animal that’s on the ground, get down as low as you can. Photographing wildlife at their level is so much more pleasing to the eye.

The same goes for shooting straight up at an animal. Its not always possible to get to their level, but by stepping back a few metres, for example, your composition will be so much nicer. In some cases, if there is a hill nearby or some steps, I suggest walking up the hill or steps so that you are on a similar level as the subject. One exception to this rule, is when there is a bird (or birds) flying above you.

3. Watch out for Distracting Backgrounds

Over the last 20+ years, I have judged thousands upon thousands of images in nature and wildlife photography competitions. So often, I have seen amazing wildlife images, only to be ruined by a very distracting background. If you look at an image and your eye goes straight to the distraction, rather than the subject, it ruins the effect you are trying to convey. By distractions, I am referring to things like man-made objects (buildings, fences, cars etc), bright highlights or blurred out trees and branches. In many situations, you can move around the subject until you have a smooth, blurred out background that doesn’t
compete with the subject.

If your subject is cooperative, I suggest shooting a few frames and then checking the images on the camera’s LCD screen. If a distraction pops out at you ‘like a sore thumb’, then change the angle or direction from which you are photographing. In some instances, if there is a distracting shiny leaf in the background, simply pick it up and move it out of the way. It’s much easier to do this in situ, rather than trying to clone out the distraction during post-processing!
(PS – many nature photography competitions don’t allow cloning of any sort, so best to move the distraction while you are physically out photographing).

4. Focus on the Eyes

One very important rule when photographing wildlife is to focus on the eyes of your subject. If the animal/bird is way out in the distance and tiny in the frame, then focusing on the actual subject is fine. But if you are closer, then it’s the eye that your camera’s focus point should be on. When viewing an image, whether it be online, in a publication or as a framed print, it doesn’t work as well if the eyes aren’t in focus. The first thing we tend to look at when looking at an image of an animal is the eyes, so it makes perfect sense to focus on them. In some instances, such as when you are photographing wildlife in an abstract or arty way, this rule doesn’t count but for most situations, it is very important.

5. Best use of Negative Space

An alternative to tight or close up shots of wildlife is the use of ‘negative space’ in wildlife photography. This is where the subject is a very small part of the image and looks out or is travelling across a vast landscape. In many wildlife photography competitions, the category ‘animals in the environment’ has become increasingly popular. The aim of such images is to capture on camera not only an interesting image of an animal, but also the environment in which this particular species lives. A stunning landscape, coupled with the subject, can make for some impressive shots. The space around the subject can greatly change the viewer’s perception of the image they are looking at. Basically, the negative space around a subject can tell the ‘story’ of the image.

In Conclusion

The best thing I can suggest is to get out there with your camera and try some of these techniques. Practise, try new techniques, then practise some more.

If you have a passion for African wildlife, nature or travel photography and would love to go on a specialised small-number, professional African photo safari, please get in touch with Michael Snedic at WildNature Photo Expeditions. You can call him on 0408 941 965 or fill in this Contact Form and he will get back to you ASAP.

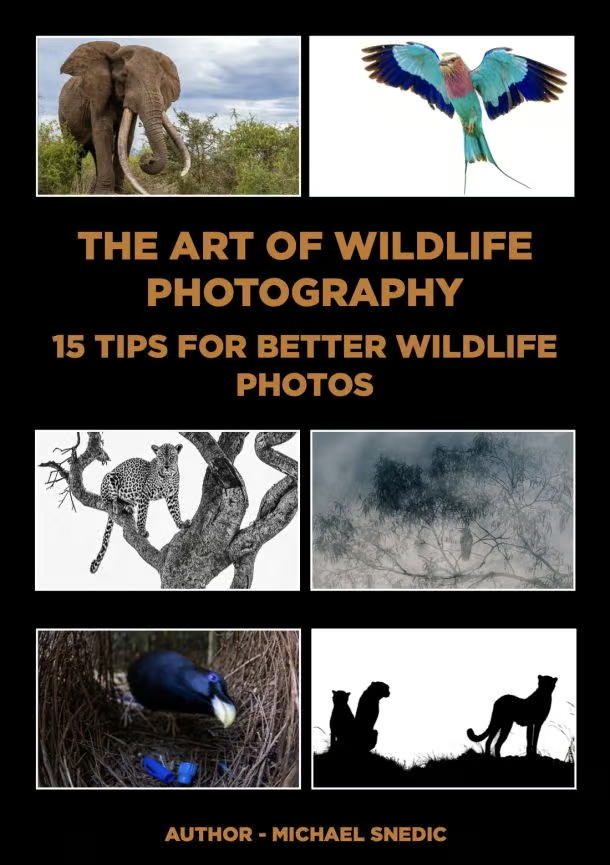
Would you like a FREE copy of my new Ebook?

Download Button

ebook The Art of Wildlife Photography by Michael Snedic July 2026 cover

You have Successfully Subscribed!