How To Best Photograph Rainforest Scenes, Including Waterfalls

How To Best Photograph Rainforest Scenes, Including Waterfalls

Rainforest buttress roots - Bunya Mountains

Standing in a rainforest, camera ready, is a wonderful experience. An image taken in a rainforest, taken under the correct conditions and using good photographic techniques, can look absolutely stunning. Below are some photographic tips to help you achieve great images.

#1 Shoot On An Overcast Day

Without exception, shots taken in a rainforest look so much more ‘natural’ when taken on an overcast day. The lighting is very even and diffused and the rich greens usually look their best. Shooting on a bright, sunny day creates images with lots of very harsh light and shadows – not very appealing to the eye. Whether it’s a mossy buttress root, a waterfall or a cascade, I strongly advise waiting for a cloudy day before you venture out with your camera.

#2 Using A Tripod

When using small apertures (high number) such as f11 or f16, it can be near-impossible to hand-hold your camera and get a sharp image, especially if the day is gloomy/dark or there is a thick canopy overhead. A sturdy tripod is an essential piece of equipment for getting great rainforest shots in low light and using small apertures (in size).

#3 Using A Circular Polariser

For the last 20+ years, I have been a strong advocate of using a Circular Polariser when taken shots in a rainforest. The Polariser has a number of different benefits, including reducing glare off water or shiny rocks and leaves, slowing your aperture by 1.5 to 2 stops, giving any running water more of a milky effect and also adding a touch of saturation to your images, without making them too gaudy or fake.

#4 Think Outside The Square

Apart for the obvious landscape rainforest image (landscapes, waterfalls and cascades), think about taking close-up images of patterns on tree trunks, moss on rocks and macro subjects such as ferns or fungi. Along with your landscape shots, these subjects add variety to your rainforest portfolio.

#5 Creating That ‘Milky’ Effect For Waterfalls

On a dark, gloomy day, by using an aperture such as f16, you can usually achieve a slower shutter speed, which gives you a ‘milky’ effect to the water. If you would like the water to me more milky, then using a neutral density filter will slow the shutter speed considerably.

#6 Be Patient

Sometimes, when you arrive at a waterfall, light conditions just aren’t quite right. The sun may still be behind the trees or nearby cliff or the sun may be out, creating harsh light. By being patient, often the conditions change or improve. The sun might end up shining ‘through’ some shrubs, creating stunning rays of light, or clouds might come across and create diffusion. I can’t think of a more relaxing place to sit and wait, than in a rainforest… It will be well worth the wait!

If you have a passion for African wildlife, nature or travel photography and would love to go on a specialised small-number, professional African photo safari, please get in touch with Michael Snedic at WildNature Photo Expeditions. You can call him on 0408 941 965 or fill in this Contact Form and he will get back to you ASAP.

Photographic Tips – Macro

Photographic Tips – Macro

Fungi


Below are some photographic tips and techniques, to help you achieve better macro images.

#1 Portable Diffuser

If you are out photographing fungi, for example, and the sun is shining bright, I strongly recommend using a portable hand-held diffuser. This is placed between the subject and the sun (therefore blocking out the harsh effect of the bright sun on your subject) and creates a nicer, more evenly-lit image.

#2 Reflector

When photographing subjects such as trumpet- shaped flowers (e.g. fuchsia, most roses, hibiscus etc), a hand-held reflector can be used to remove any shadows inside the flower. By holding the reflector in a way that reflects natural light onto the shaded part, it creates lovely, even lighting.

#3 How Do I Focus Closer?

I have been asked countless times by photographers “How Do I Get Closer Focus On Tiny Subjects”? The answer is quite simple – buy yourself a set of Extension Tubes. These tubes fit in between the camera and lens of an SLR and allow you to focus much closer than your minimum focus distance usually is. There is no glass in extension tubes, so you won’t lose any image quality. You will, however, lose light so a tripod or flash unit is needed in order to avoid blurry images.

#4 Using A Macro Clamp

A macro clamp is a device designed to hold moving plants still, especially outside on a windy day. One end of the clamp is attached to your tripod leg and the other to the stem of a moving plant, holding it still. I have had one for many years and highly recommend this product!

#5 Using The Aperture To Change Depth of Field

If you are planning to photograph a plant with a stamen that’s quite colourful, you might want the stamen to stand out. You can do this by using a shallow depth of field (such as f4 or f5.6). Alternatively, you might light to capture more of the flower, so using an aperture of f16 or f22 is recommended.

#6 Automatic or Manual Focus?

I personally prefer using manual focus for my macro subjects, unless its a moving subject such as a bee buzzing over a flower, where auto focus is much easier to use. When using a tripod, I suggest using manual focus, in conjunction with the camera’s Live View set`ting. This makes it so much easier to focus more accurately.

If you have a passion for African wildlife, nature or travel photography and would love to go on a specialised small-number, professional African photo safari, please get in touch with Michael Snedic at WildNature Photo Expeditions. You can call him on 0408 941 965 or fill in this Contact Form and he will get back to you ASAP.

Photography Tips – How To Capture Birds In Flight

Photography Tips – How To Capture Birds In Flight

Red-tailed Tropicbird


Capturing great shots of birds-in-flight can be quite challenging, but by following a few basic techniques, your chances of getting great shots will improve greatly.

#1 Use Continuous Focus

By using Continuous Focus (or AI Servo for Canon users), you will have a much greater chance of getting well-focused shots of flying birds. Lock your camera’s focus point on the bird while it’s flying and keeping it on the bird, while holding the shutter button half-depressed. The focus will stay on the bird and when you are ready, take a series of shots using the Continuous Shot or Burst mode.

#2 Leave Room In The Direction The Bird Is Flying

When photographing flying birds, always leave room in the direction the bird is flying, be it left or right. It’s important to leave more room in front and not have ‘wasted’ space behind the bird.

#3 Using Back Button Focus

Back-button focus is recommended for birds-in-flight, as the focus stays on the bird and doesn’t jump to the background as soon as the focus point misses the bird. The focus button is set via the camera’s men, so it on the back of the camera and totally separate from the shutter button on the top.

#4 Zoom Out

One suggestion for getting sharp shots of birds flying is to zoom out wider, making it easier to find the bird. Once you have locked focus on it, you can then zoom in closer. It’s much easier keeping focus on a flying bird, once you have found it in the frame.

#5 Eye Level

Try getting as close to eye level as possible when photographing birds, as this makes for much better composition. If the bird is high in a tree, step back some metres, as the image will be much more aesthetic. Also, if the bird is on the ground, I suggest getting down low with your camera before taking the photo.

#6 Watch Your Background

For many years, I have been teaching my photo workshop students to watch their backgrounds when photographing birds, especially trees sticking up out of heads etc. If the bird is sitting, spend a few seconds looking for the most natural background, compose and shoot!

If you have a passion for African wildlife, nature or travel photography and would love to go on a specialised small-number, professional African photo safari, please get in touch with Michael Snedic at WildNature Photo Expeditions. You can call him on 0408 941 965 or fill in this Contact Form and he will get back to you ASAP.
Which Photo Workshop or Tour Is For Me?

Which Photo Workshop or Tour Is For Me?

Penguin Encounter - Antarctica Photo Expedition

For the last 15 or so years, I have been presenting photography workshops and tours across Australia and overseas. These vary from short beginner courses that are a few hours in duration, right up to two and three week photo expeditions to places such as Antarctica, The Arctic, Africa and the Galápagos Islands. Often people ask me “which Photo Workshop or Tour do you recommend for me”, so I am going to give a few suggestions here.

#1 What Is Your Primary Goal When Choosing A Photo Tour

Are you wanting to experience wonderful new places, get shown amazing subjects and be shown how to best photograph them? Are you simply wanting to improve your photo techniques? Do you enjoy the company of like-minded people, who are there to learn how to take better photos? What is your budget? How long can you afford to be away?

Think about these questions before choosing which type of photo workshop or tour you wish to join.

#2 What Experience Does The Photography Tutor Have?

A very important feature to consider when choosing a photo tour is what type of experience does the tutor have (and how long have they been tutoring). There are lots of people who think that by registering a name and creating a Facebook page, they can start selling tours. Customers want experience and that’s what they are paying for. I can honestly say, that after presenting hundreds of photography courses, workshops and tours, over 15 years and to thousands of participants, I am one of the most experienced photography tutors in Australia. I know all camera brands well, hardly ever need to look at an owner’s manual and know photographic settings like the back of my hand.

#3 Photographic Tour Companies – Are You Covered?

Many Photo Tour Companies don’t have Public Liabilty Insurance or aren’t covered by National Parks permits. If something goes wrong, you need to know you are fully-covered in case of an accident or emergency. WildNature Photo Expeditions has 20 000 000 Public Liabilty Insurance and has permits for all National Parks where it is a requirement to have a Commercial Activity Agreement.

#4 What Is Included In My Photo Tour

It is important to read the ‘Inclusions’ and ‘Exclusions’ section, to see exactly what you are getting. You don’t want any nasty surprises halfway through your photo tour!!

#5 Does The Photo Tour Accept Different Skill Levels?

Photo Tours often don’t accept beginners, or are beginner-specific and some cater for a broad range of skill levels. Its important to research what levels of photography skills are taught and choose a photo workshop or tour that suits your needs.

If you have a passion for African wildlife, nature or travel photography and would love to go on a specialised small-number, professional African photo safari, please get in touch with Michael Snedic at WildNature Photo Expeditions. You can call him on 0408 941 965 or fill in this Contact Form and he will get back to you ASAP.

Tips for Winter Wildlife Photography

Tips for Winter Wildlife Photography

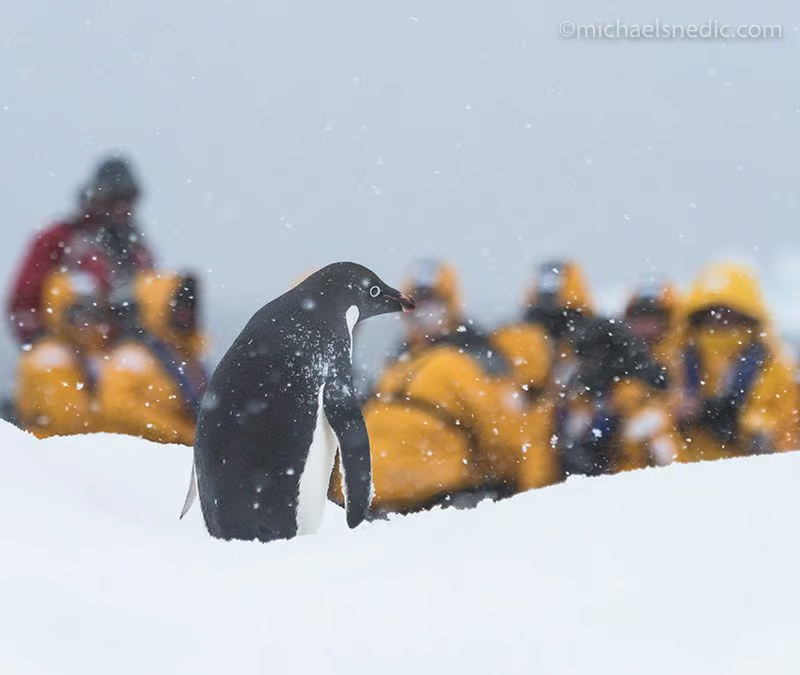
Adelie Penguin in Antarctica - Photographing Wildlife in Winter

Winter wildlife photography can be tricky, especially if you have to deal with snowfall and a white landscape. It’s always interesting to photograph the natural and unique wildlife of the alpine region in Victoria and NSW, or in various parts of Tasmania, during snowfall, or overseas in places such as Antarctica and the Arctic Circle. Here are some tips on how to handle winter wildlife photography:

#1 Be Thorough With Your Research

Before you book your trip and pack your bags, do some research on winter wildlife photography. You’ll save some time and effort if you know where you should go to get the best wildlife and landscape pictures. Here are some points to consider before you leave:

  • When is the best time to visit the alpine regions for photography?
  • Which animals would make the best subjects for winter wildlife photography?

Research is even more important if you intend to visit other countries that have colder winters, especially if they’re in the Northern Hemisphere.

#2 Know Your Camera Settings

There’s a reason why people wear protective eye-gear when they ski or trek in snow-covered landscapes. The white ground reflects light intensely and overwhelms a subject in a photograph. If you intend to take wildlife pictures in the snow, you should experiment with the ideal settings for your camera. Switch to the manual mode and adjust your settings to get the best exposure and details.

You need to fill the frame with snow, determine whether it’s overcast or bright and reflective, check the settings, and then alter them according to your preferences. Be careful to avoid underexposure because you don’t want the snow or the subject to look dull and grey.

#3 Be Mindful of the Shutter Speed

Animals move quickly so you need to adjust your shutter speeds to keep up. If your shutter speed is too slow, your picture will be blurry and out of focus. Some wildlife are very fast and can be barely visible to the naked eye, especially if the temperature is too cold and the ground is covered with snow. You may have to increase the ISO as well, but that shouldn’t be a problem with many modern day cameras/sensors.

#4 Consider the Background

In wildlife photography, the focus of the picture should be the animal rather than the background. As winter landscapes can be very beautiful or overwhelming, it’s easy for the animal to become lost in the details or overpowered by the background. Before you click the shutter button, look at the image in the frame and determine if the animal is showcased well. This is important if you’re working with smaller wildlife like birds, rodents, and insects.

You can use larger apertures (smaller number) to ensure your background blurs out. Try taking multiple shots from different angles, to get the best results.

#5 Take Care of Your Gear

If you’re using your camera in very cold weather, you need to be careful. Avoid sudden temperature differences, as this can create instant condensation, making photography impossible. If your camera has been in a cold environment for a while, let it warm up a little before you carry it to a warmer location. Same goes with from a warm, humid environment, into the freezing cold.

If you have a passion for African wildlife, nature or travel photography and would love to go on a specialised small-number, professional African photo safari, please get in touch with Michael Snedic at WildNature Photo Expeditions. You can call him on 0408 941 965 or fill in this Contact Form and he will get back to you ASAP.

Use the Right Method To Clean Your Camera’s Lenses

Use the Right Method To Clean Your Camera’s Lenses

Cameras, like all modern devices, tend to attract dirt and dust. That’s especially true if you go on nature photography excursions because there’s plenty of dust in such environments. Most of the dirt and smudges tends to settle on the camera lens, which can have an impact on the picture quality. It’s important to learn how to clean and maintain camera lenses before you go on a photography excursion. Here are a few suggestions that can help you maintain the lens:

#1 You Don’t Need to Clean it Daily

It’s a common misconception that camera lenses should be cleaned daily with cleaning solutions, as this can cause more harm than good. You could eventually wear down and permanently damage the delicate lens surface. You should clean the lens when you see a layer of dust or smudges on it. I recommend that you install a UV filter on the lens, as this filter will protect the lens from dust, scratches, smudges, and possible breakage. It’s a great preventive measure that will help you preserve your lens for a longer period of time.

#2 Use Lens Cleaning Liquid

You’ll find this liquid in almost all professional camera stores. Alcohol-based cleaning solutions are the most effective cleaners available in the market because they don’t leave residue and cleaning streaks on the lens. The solution evaporates almost immediately after it cleans dust, grease, and fingerprints. Just be careful not to use too much because that can damage the lens surface permanently. You should use a drop or two of the solution, rub the lens gently to agitate the dirt, and wipe everything away.

You can also blow breath on the lens surface to moisten it and wipe away the dirt with a cloth. This is a good solution if you only have a fine layer of dust on the lens.

#3 Special Cleaning Tissues

You can find specialised cleaning tissues in a camera store. The’re made from a very fine material so they won’t scratch the lens surface during the cleaning process. Normal facial wipes or tissues aren’t a good substitute because they will cause damage to the lens. The camera lens cleaning tissues are softer and designed for single time use. They’re great for nature excursions because you can use and discard them immediately after you’re done.

#4 Cleaning Cloth

You can use a microfiber cloth to clean your camera lens as well. This material will wipe away all the dust, debris, grime, and finger prints on the lens. However, you need to keep the cloth clean and dust-free to ensure it doesn’t damage the lens. The dust and debris on the microfiber cloth can scratch your camera lens, especially if there are large particles of dust on it. Just blow on the lens to remove the large fragments and make sure your microfiber cloth is clean before you wipe the lens.

#5 Blowers

You can also use a blower, such as a ‘Giotto Rocket’, which I have used for years. It’s a small, handy device that will pump air on the surface to remove the dirt and debris. You can use this tool to clean your lenses and external parts of your camera.

If you have a passion for African wildlife, nature or travel photography and would love to go on a specialised small-number, professional African photo safari, please get in touch with Michael Snedic at WildNature Photo Expeditions. You can call him on 0408 941 965 or fill in this Contact Form and he will get back to you ASAP.

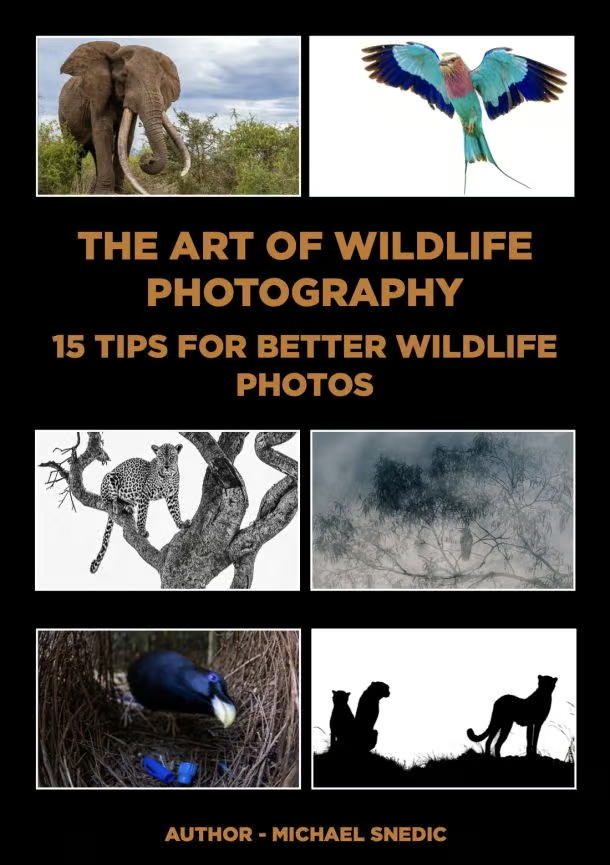
Would you like a FREE copy of my new Ebook?

Download Button

ebook The Art of Wildlife Photography by Michael Snedic July 2026 cover

You have Successfully Subscribed!