Top 6 Photography Tips for Great Macro Shots

Top 6 Photography Tips for Great Macro Shots
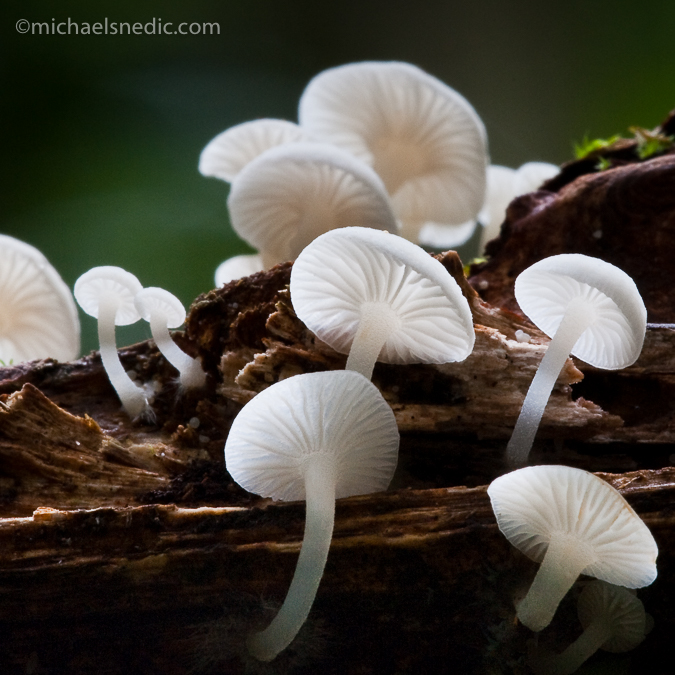
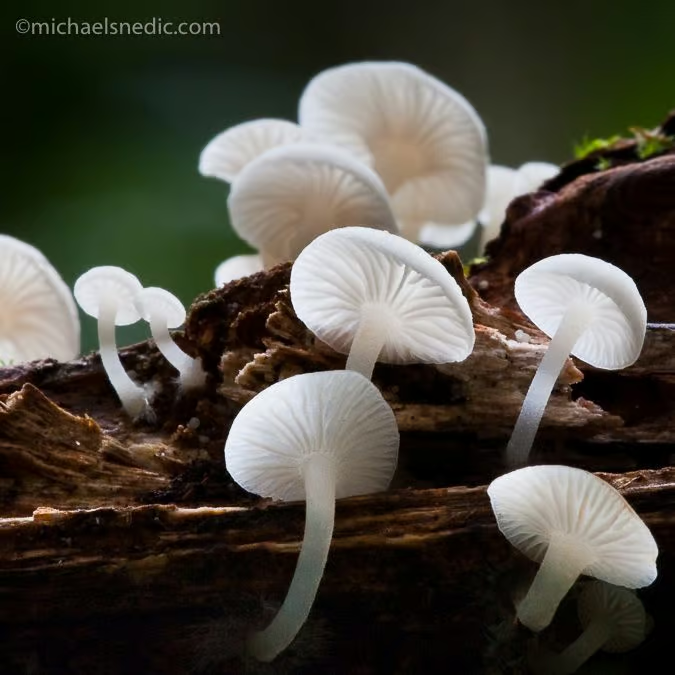
Gilled Fungi

Photographing the tiny things in life can be loads of fun and very rewarding. Some photographers find getting decent macro shots quite daunting, so below are 6 tips to help you achieve better images.

  1. Macro Lenses Recommended

Without doubt, using a dedicated macro lens is the best way to go. They are usually very sharp and allow for quite close focusing. Lens focal lengths range from 50mm to 200mm. Although many lenses have a ‘macro setting’, they aren’t true macro lenses.

  1. An Alternative – Extension Tubes

Extension tubes fit between your camera and lens and are available in various sizes. They can be used individually or stacked on top of each other. The advantage of using extension tubes is that they allow for much closer focusing than your standard lens allows. There is no glass involved, so there is no quality loss whatsoever.

  1. Controlling Depth of Field Using Various Apertures

Using smaller apertures (in size) such as f 16 or f22 will allow for better depth of field. In some cases, such as when you are wishing to photograph the stamen of a flower, for example, and blur out the background, a wider aperture such as f2.8 or f4 can be used. The advantage of this is that you can completely blur out the background, making the area you are focusing on stand out.

  1. Using A Macro Clamp

Macro clamps, such as the ‘Wimberley Plamp’, are highly recommended when photographing plants, especially in windy conditions. One end of the clamp is attached to your tripod while the other holds the plant still.

  1. Focal Point

It’s very important to choose a focal point when photographing macro subjects. This is often known as the ‘leading edge” and is the first part of the image that the eye is usually drawn to.

  1. Manual Focus

I have always been an advocate of using manual focus when photographing macro subjects, as you can control exactly where you want to focus. Using a tripod with manual focus is also recommended.

If you have a passion for African wildlife, nature or travel photography and would love to go on a specialised small-number, professional African photo safari, please get in touch with Michael Snedic at WildNature Photo Expeditions. You can call him on 0408 941 965 or fill in this Contact Form and he will get back to you ASAP.
Photographing Wildlife: Best at Eye-level and Watch for Distractions

Photographing Wildlife: Best at Eye-level and Watch for Distractions

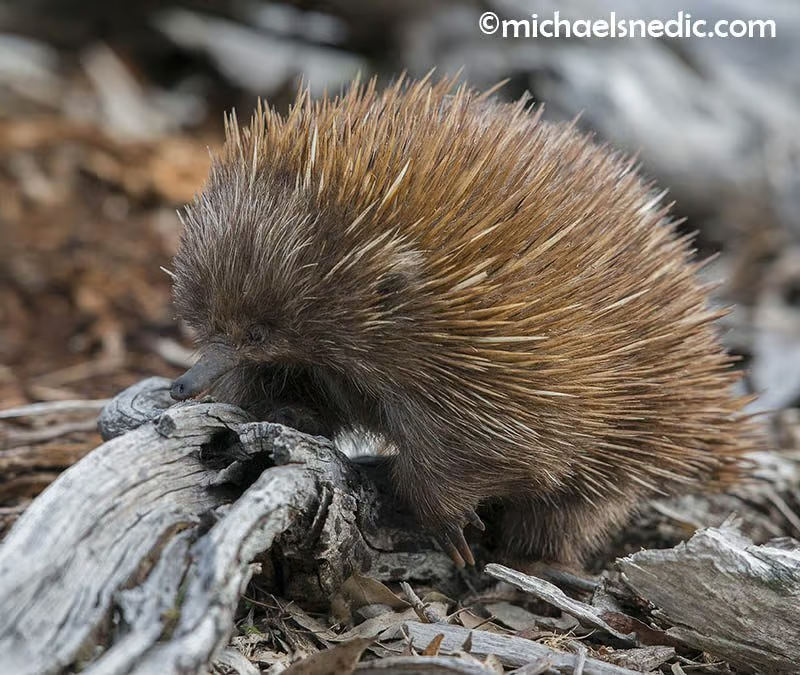
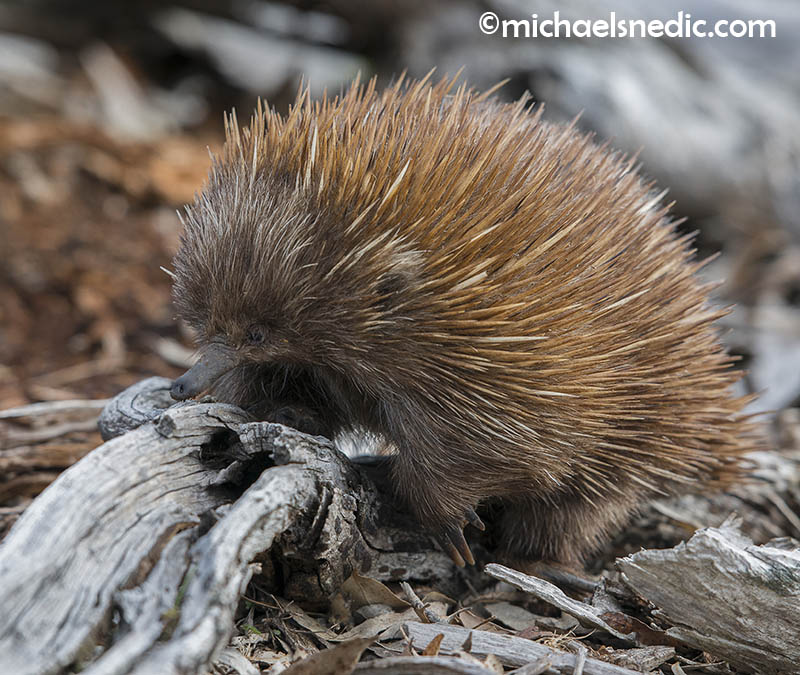
Echidna

One of the most important aspects of wildlife photography is getting shots as close to eye level as possible. Unless you are photographing a bird flying in the sky, generally looking up at wildlife or down over the top of them, simply doesn’t look right.

Over the last 15+ years of presenting wildlife photography workshops and courses, I have always told participants to get down low when taking shots of birds and other wildlife. Either lie on the ground, or at least squat down to a position that’s comfortable. Shots taken at eye level look so much more natural and appealing to the eye.

If an animal is up a tree, the angle can be quite severe, so one trick is to step back to reduce the steep angle. Also, depending on where you are, if there is a nearby hill or steps, head on up and get as close as you can to the height of your subject.

Backgrounds are important as well. Nobody wants to see a shot of an animal that has a busy, distracting background. Before I take photos of wildlife, I regularly look at the background to see if it’s busy. If so, and the situation allows, I will move around until I have a clear background. This, coupled with a wide aperture (i.e. small number) will help separate the animal from the background and make it stand out.

Lastly, it’s very important that there aren’t any distracting trees, poles, buildings or other objects sticking up directly behind the subject you are photographing. There is nothing worse that a tree ‘growing’ out of the head of the subject you are photographing!

If you have a passion for African wildlife, nature or travel photography and would love to go on a specialised small-number, professional African photo safari, please get in touch with Michael Snedic at WildNature Photo Expeditions. You can call him on 0408 941 965 or fill in this Contact Form and he will get back to you ASAP.
Photography Tips and Techniques – Frogs

Photography Tips and Techniques – Frogs

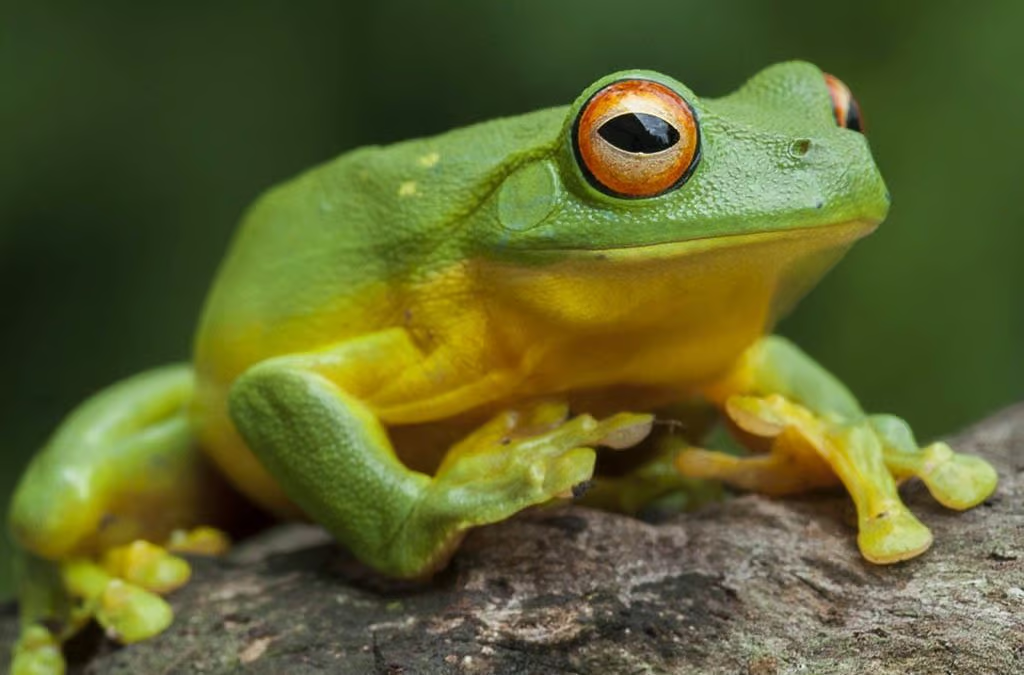
frog

Frog are, without doubt, one of the most beautiful groups of wildlife to photograph. There are countless species out there and they are found in a variety of different shapes, sizes and colours. Frogs have always been very popular photographic subjects, but unfortunately many photographers struggle with getting great shots. In this article, I am listing some of the proven techniques I have used over the past 21 years in achieving great frog shots.

Subtle Flash Is Best

I regularly see images of frogs (which are mostly taken at night) that are way too bright. This is due the photographer using incorrect flash techniques. I recommend using a macro or ring flash (or similar) and reduce the power of the flash if needed. If you are using a conventional flash that sits on your camera’s hot shoe, I would suggest using a diffuser on the flash, to reduce the intensity of the light emitted. This will eliminate any harsh light from being thrown directly onto the frog, causing unsightly overblown areas.

Using Correct Depth-Of-Field

If the frog you are photographing is positioned front-on to you, I like to make sure that at least the head (especially the eyes) of the frog are in focus, as well as the toes and legs. The back of the body can be out of focus, as this draws the eye of the viewer towards the most important parts. In some cases, where a frog has beautiful eyes, such as the Red-eyed Green Tree Frog shown above, it’s also okay to focus on just the eyes and front of head, to showcase this feature, while the rest of the body is blurred.

Busy Backgrounds

A busy, cluttered background can be quite distracting in a photo featuring a frog. It’s not always possible to choose where the frog will be, so using shallow depth-of-field will help you blur the background out.

In situations where there are are quite a few frogs around, I suggest choosing one individual that is on its own and separated from the background, so that it stands out.

Best Time To Photograph Frogs

Depending on where you live, there can be quite a few opportunities to photograph frogs. In Queensland, Australia, where I live, there are quite a few frogs around and obviously the warmer and wetter it is, the more frogs you will find. In places like Lamington National Park, Red-eyed Green Tree Frogs are easily found in the small ponds at night time.

In Far North Queensland, where its warmer for longer and much more humid, there are lots more frogs, both in numbers and species. Many people have resident frogs living in and around there homes.

There are also various ‘frog clubs’ around, which are worth joining. They often have expert enthusiasts who not only know the different species and their calls, but also where to find them.

If you haven’t tried photographing frogs before, why not give it a try? After 21 years of photographing them, I still get satisfaction photographing these wonderful creatures.

If you have a passion for African wildlife, nature or travel photography and would love to go on a specialised small-number, professional African photo safari, please get in touch with Michael Snedic at WildNature Photo Expeditions. You can call him on 0408 941 965 or fill in this Contact Form and he will get back to you ASAP.

Photography Competition Tips – Wildlife

Photography Competition Tips – Wildlife

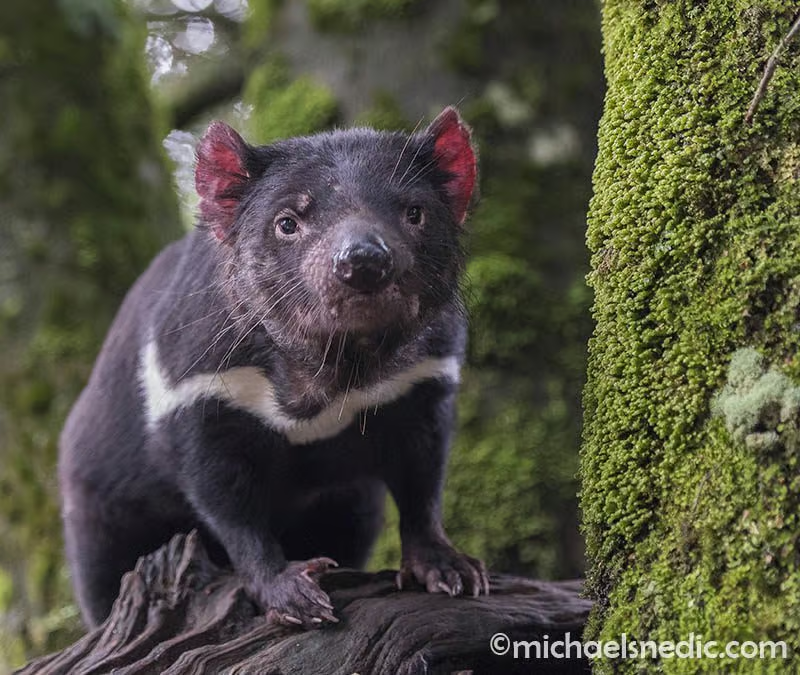
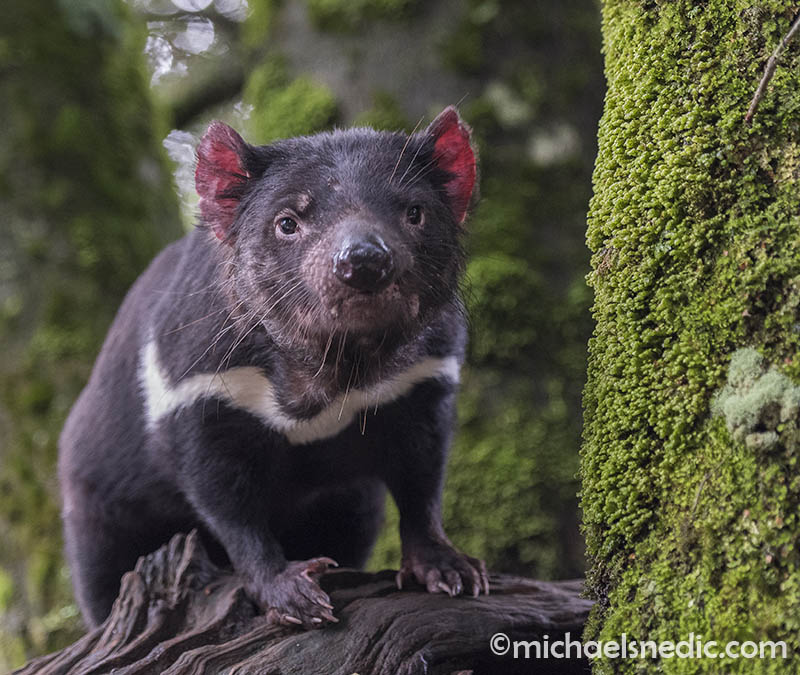
Tasmanian Devil

As a photography competition judge for the last 10+ years, I have seen an incredible number of entries come my way, with many shots potential winners, had it not been for certain aspects that made the entries lose that chance to progress through to the end. In this article, I have written some helpful advice that will increase your chances of going all the way with your entries!

Read The Rules Carefully!!

Its hard to fathom how often amazing images are instantly disqualified, simply due to the fact that the entrant hasn’t read the rules!!

So often, I see beautiful images entered into photography competitions that could potentially do really well, but they are entered into the wrong category! Sadly, that’s instant disqualification…. In some cases, I’ve seen images entered into ‘wildlife’ yet the subject will be a dog or other domestic animal. In other examples, where its clearly states that cloning in Photoshop isn’t allowed, photographers have blatantly done this. This is why many photography competitions ask for RAW files, which show the original file that hasn’t been manipulated.

Quite simply, READ THE RULES. Read them carefully, read them again and if you are uncertain about any of the points, contact the competition organisers and ask some questions.

Don’t Emulate Last Year’s Winners

Year after year, I see photographers trying to ‘copy’ the winner of the previous year’s photo competition. Quite simply, this won’t work, as it has already been done… You need to look at new ideas that will catch the eye of the judge(s).

Watch Your Background

A distracting background is the last thing you want when showcasing a particular subject. Smooth, clear backgrounds for many wildlife subjects are recommended and won’t lead your eyes away towards something in the background that is overblown or brightly-coloured.

Also, the last thing you want is for trees, poles or other objects to stick out behind the head of your wildlife subject. I have often seen during the photography workshops I present, that participants get really ‘into’ photographing a subject and forget to look at the background.

Think Outside The Box

Composition is a key part of creating an interesting shot of wildlife, so think about trying different angles and focal lengths that are normally considered outside the ‘norm’. The key is originality!

Images Must Be Sharp

An image that isn’t pin-sharp won’t even get past the first round of judging. If you look at the images you are planning to enter into a competition, and they look a tad ‘soft’, then relegate them to the trash bin… Unsharp images will never win a photography competition. With wildlife, its also paramount to focus on the eyes.

Never, Ever Give Up

You may have entered plenty of photos into competitions in the past, but never, ever give up. Keep photographing, keep entering and eventually, all of your hard work could pay off.

If you have a passion for African wildlife, nature or travel photography and would love to go on a specialised small-number, professional African photo safari, please get in touch with Michael Snedic at WildNature Photo Expeditions. You can call him on 0408 941 965 or fill in this Contact Form and he will get back to you ASAP.
Getting It Right In Camera

Getting It Right In Camera

Getting It Right In Camera

One of the most important things I have been teaching photography workshop participants over the last 15 years is to make sure they ‘Get It Right In Camera’. Sure, there are lots of great post-processing programs out there that you can use to develop images, but it’s important to make sure you have a decent image to start with in the first place.

Sharpening Blurry Images Is Impossible
If an image is blurry due to a low shutter, the chances of correcting that image are near-impossible in post-processing. Images can be sharpened but no amount of computer work can ‘fix’ an image that’s blurry from the start. Learning the correct settings and techniques from the start is an important part of photography.

Overblown Images
Over- exposure is difficult to correct in post-processing. A small amount of over or under exposure can be adjusted in Photoshop or Lightroom (especially when shooting in RAW), but no amount of manipulating will improve an over-exposed image. When an area is over-blown, it’s difficult fixing the problem when post-processing. Learn to use the appropriate exposure settings, then once you are comfortable with those settings, the number of properly-exposed images will increase.

Natural Lighting Versus HDR Merging
In landscape photography, there is a technique that some photographers use that blends over and under-exposed areas in the one shot. This is known as merging using HDR (High Dynamic Range), where you take a number of images at different exposures and then blend them on the computer, using one of the numerous HDR programs on the market. The issue I have with this method is that so often the images are over-processed by photographers, giving them a ‘fake’ look. I don’t have an issue with photographers using HDR merging techniques, but it’s imperative to process carefully to achieve optimum image results. Personally, I don’t use HDR and work to ‘get it right in camera’. I prefer to scout the best locations, look at weather forecasts, then head on out to photograph at the best times of the day. This is often at sunrise or sunset, or on a cloudy day if photographing in a rainforest, where diffused light is always best.

At the end of my photography workshops and tours, I often make this comment:

“I always prefer to ‘get it right in camera’ and spend quality time outdoors, than to sit behind a computer post-processing images that were shot poorly in the first place”.

If you have a passion for African wildlife, nature or travel photography and would love to go on a specialised small-number, professional African photo safari, please get in touch with Michael Snedic at WildNature Photo Expeditions. You can call him on 0408 941 965 or fill in this Contact Form and he will get back to you ASAP.
How To Avoid Common Wildlife Photography Mistakes

How To Avoid Common Wildlife Photography Mistakes

Albert's Lyrebird displaying

One of the most common difficulties encountered with wildlife is photographing them in low light, such as in rainforests or on days with dark clouds overhead, or even at dusk when they might become more active. It can be especially difficult to get decent shots when hand-holding a large lens in such conditions – the result can be blurry shots. If your lens has the function, using Image Stabilisation (called Vibration Reduction for Nikon lenses and Optical Stabilisation for Sony lenses) really helps to get sharp shots where shutter speeds are low. You can generally hand-hold two to three shutter speeds lower than would normally be necessary for sharp shots, when you’re using image stabilisation.

However, another way to stabilise your hand-held camera and lens is to use a photographer’s beanbag. This is usually filled with seeds, rice or beans and can be placed on the ground, on a post or rock and even on the roof or bonnet of a car. Your camera and lens are then nestled into the beanbag to give great stability. For the Little Egret image that I photographed, I placed the beanbag on the ground so that I was at eye-level with the bird. I was easily able to move my camera/lens and follow the bird until it spread its wings and pounced on the tiny fish in the water.

It can be quite tricky knowing when an animal will perform a particular behaviour. One of the crucial aspects of capturing great behavioural shots is to spend time beforehand researching the particular species you might wish to photograph. Having a bit of prior knowledge of the species’ behaviour gives you a much greater chance of predicting what it might do. I would also advise you observe the behaviour of each individual first. You can then wait patiently with your camera until something happens, with some chance of anticipating its patterns of behaviour. This is exactly what happened with a Lace Monitor I was photographing at Rocky Creek, in tropical North Queensland. I spent many hours, over period of a week, observing the behaviour of a male monitor on a property where I was staying. When another male appeared anywhere nearby, the subject I was photographing would often rear up in a territorial stance. So I waited, and as soon as the other male appeared, I had the camera ready and focussed on my subject.

A wildlife behaviour shot which is very popular with photographers, but often seems to be in the ‘too hard basket’, is a breaching whale. In Australia, there are quite a few whale- watching cruises which operate both on the east and west coasts of Australia. No one can guarantee if and when a whale will breach, but when it happens, knowing certain patterns the whales often follow increases the chance of getting great breach shots. Often when there is a breach, it will be followed soon after by more. By noting where the first breach occurs and then pointing your camera just in front of the breach (in the direction the whale is travelling), your chances of getting more breach shots are greatly increased. This happened on one of the whale photography workshops I presented recently. A calf breached and this was followed by a succession of over 20 more! Each and every participant managed to get a series of great shots of whales breaching, just by following this simple instruction.

Another challenge for the wildlife photographer is getting close enough to a subject without scaring it away. For wildlife which often visit one area, using a camouflaged hide is a good strategy. There are many portable hides on the market that are quite light and easy to set up. I recommend positioning the hide a reasonable distance from your subject and then leaving it a while. That way the subject can get used to it and continue with its normal behaviour. If you see the animal is taking no notice of the hide, move it closer still, until you’re at your desired distance. This is how I managed to shoot the rare and incredibly elusive Albert’s Lyrebird, in south-east Queensland. Without a hide, the lyrebird wouldn’t have ventured anywhere near me and my camera. Bear in mind that councils and conservation groups also set up established hides at some locations, often in parks where waterbirds frequent. These are also great spots to shoot from, as long as you’re prepared to exercise patience. Make sure you bring snacks, drinks, and warm clothes if the conditions are cool – and possibly a cushion for those hard wooden benches!

If you have a passion for African wildlife, nature or travel photography and would love to go on a specialised small-number, professional African photo safari, please get in touch with Michael Snedic at WildNature Photo Expeditions. You can call him on 0408 941 965 or fill in this Contact Form and he will get back to you ASAP.
Would you like a FREE copy of my new Ebook?

Download Button

ebook The Art of Wildlife Photography by Michael Snedic July 2026 cover

You have Successfully Subscribed!